> ## Documentation Index
> Fetch the complete documentation index at: https://docs.abbyy.com/llms.txt
> Use this file to discover all available pages before exploring further.
# Configure the user interface for a single-document case
> Build the Pega UI for a single-document case: add file attachments, embed the FlexiCapture verification page via iframe, and add the pyCaseInformation.
The case interface needs a way to attach files, an embedded verification page, and a section that displays the captured data.
## Skip the Create view
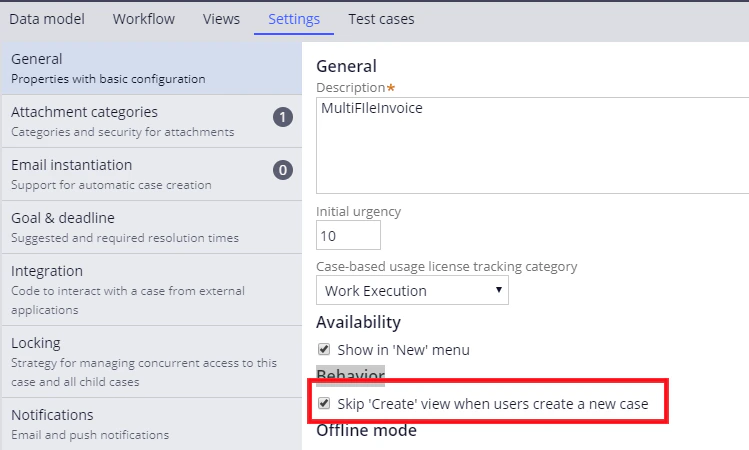
Skipping the **Create** view takes a new case straight to case configuration.
Open the case in **Case types** and click **Settings**.
On the **General** tab, select **Skip 'Create' view when users create a new case**.
 ## How users attach files to a case
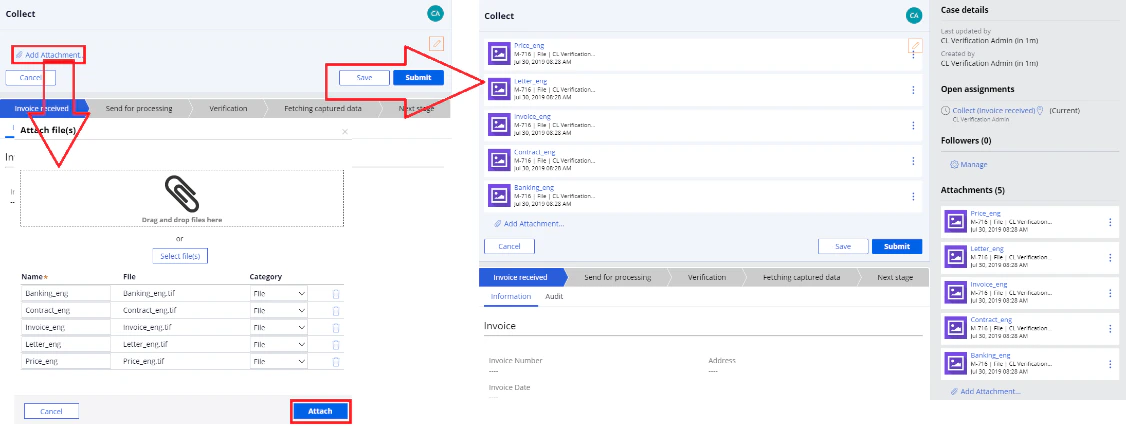
In a configured case, the user clicks **Add attachment → File from device**, selects the files and clicks **Attach**, and then clicks **Submit** to run the workflow.
## How users attach files to a case
In a configured case, the user clicks **Add attachment → File from device**, selects the files and clicks **Attach**, and then clicks **Submit** to run the workflow.
 ## Create the file attachment interface
Open the `InvoiceReceived_Flow` flow in **Dev Studio** by clicking **Record → Process → Flow**, or **App** → `` → **Process → Flow**.
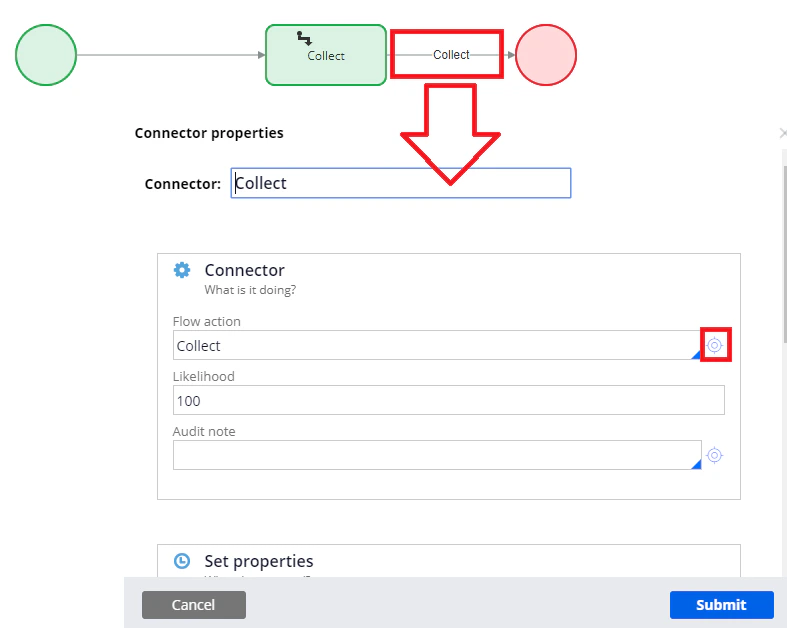
Open the properties for the connector of the two stages. In the **Flow action** field, add a flow action for adding files.
For more information, see [Creating a flow action](/flexi-capture/connectors/pega/pega-flow-action).
## Create the file attachment interface
Open the `InvoiceReceived_Flow` flow in **Dev Studio** by clicking **Record → Process → Flow**, or **App** → `` → **Process → Flow**.
Open the properties for the connector of the two stages. In the **Flow action** field, add a flow action for adding files.
For more information, see [Creating a flow action](/flexi-capture/connectors/pega/pega-flow-action).
 ## How the verification page appears
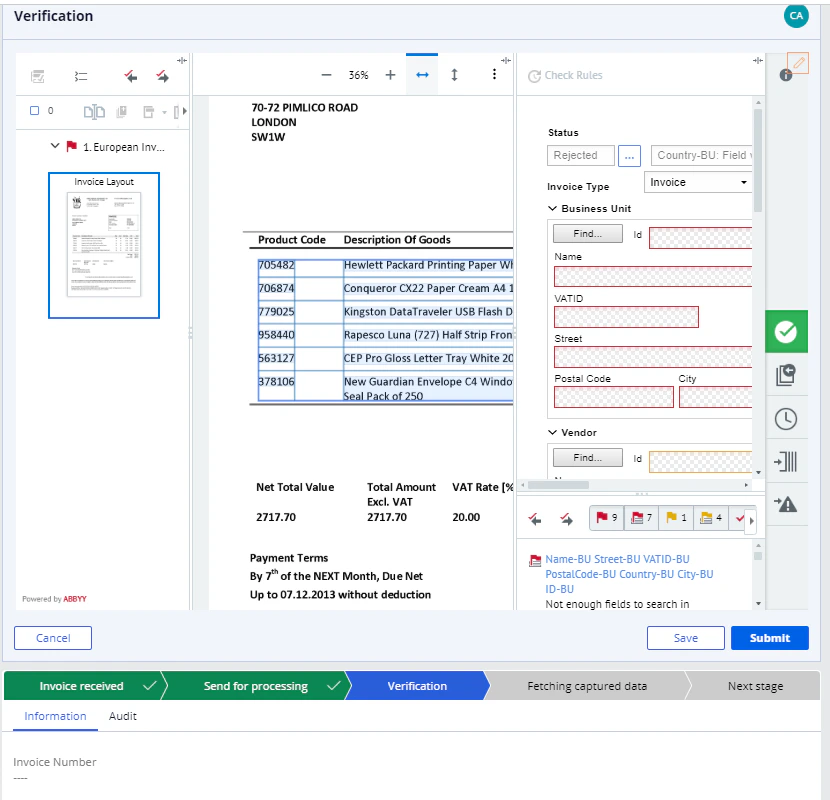
The verification page displays in the case header when the document arrives at the verification stage.
To continue processing the document after verification, the operator clicks **Complete Task**, waits for the `Task completed` message, and then clicks **Submit**.
## How the verification page appears
The verification page displays in the case header when the document arrives at the verification stage.
To continue processing the document after verification, the operator clicks **Complete Task**, waits for the `Task completed` message, and then clicks **Submit**.
 ## Create the verification page interface
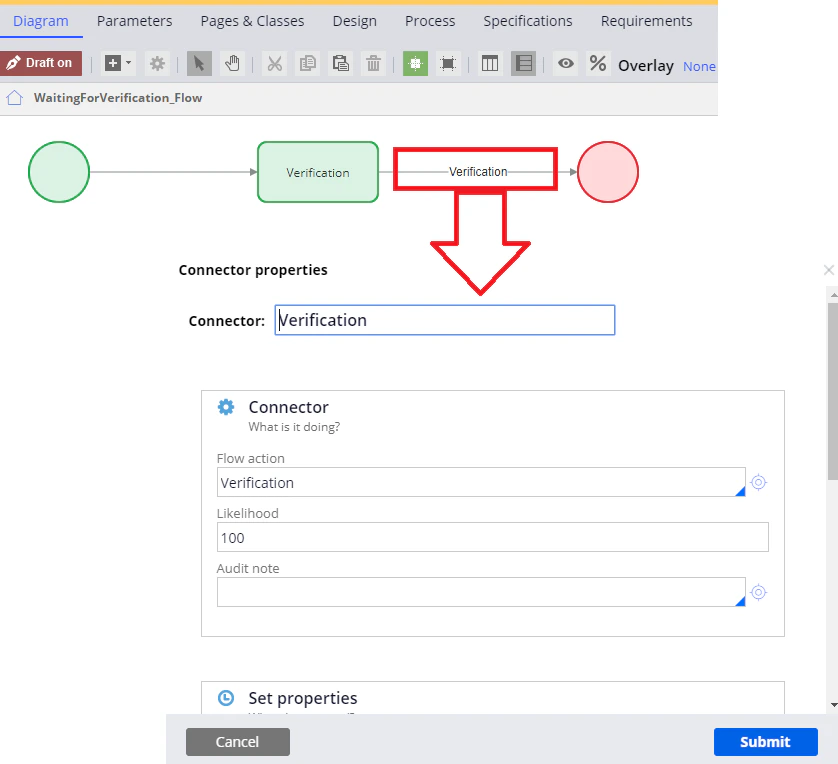
Open the `Verification_Flow` flow in **Dev Studio** by clicking **Record → Process → Flow**, or **App** → `` → **Process → Flow**.
Open the properties for the connector of the two stages. In the **Flow action** field, add a flow action holding a verification page.
For more information, see [Creating a flow action](/flexi-capture/connectors/pega/pega-flow-action).
## Create the verification page interface
Open the `Verification_Flow` flow in **Dev Studio** by clicking **Record → Process → Flow**, or **App** → `` → **Process → Flow**.
Open the properties for the connector of the two stages. In the **Flow action** field, add a flow action holding a verification page.
For more information, see [Creating a flow action](/flexi-capture/connectors/pega/pega-flow-action).
 ## Skip the verification stage
A batch that skips verification on the ABBYY FlexiCapture side goes straight to the `Processed` stage, so the case does not need to verify it either. That happens when no verification stage is set up, and for other reasons.
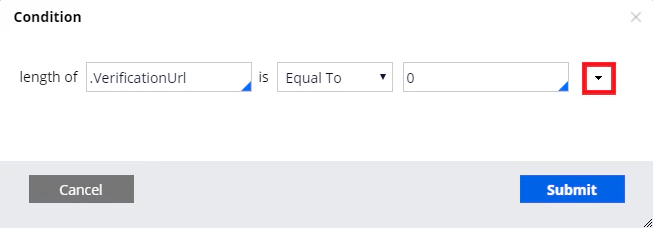
Select the verification stage in the workflow, click the **Validation** tab, and create a new `VerificationUrlEmpty` rule.
Create a `length of .VerificationUrl is Equal To 0` rule.
## Skip the verification stage
A batch that skips verification on the ABBYY FlexiCapture side goes straight to the `Processed` stage, so the case does not need to verify it either. That happens when no verification stage is set up, and for other reasons.
Select the verification stage in the workflow, click the **Validation** tab, and create a new `VerificationUrlEmpty` rule.
Create a `length of .VerificationUrl is Equal To 0` rule.

 ## Create the pyCaseInformation section
A section is what displays the data received from ABBYY FlexiCapture in a Pega case.
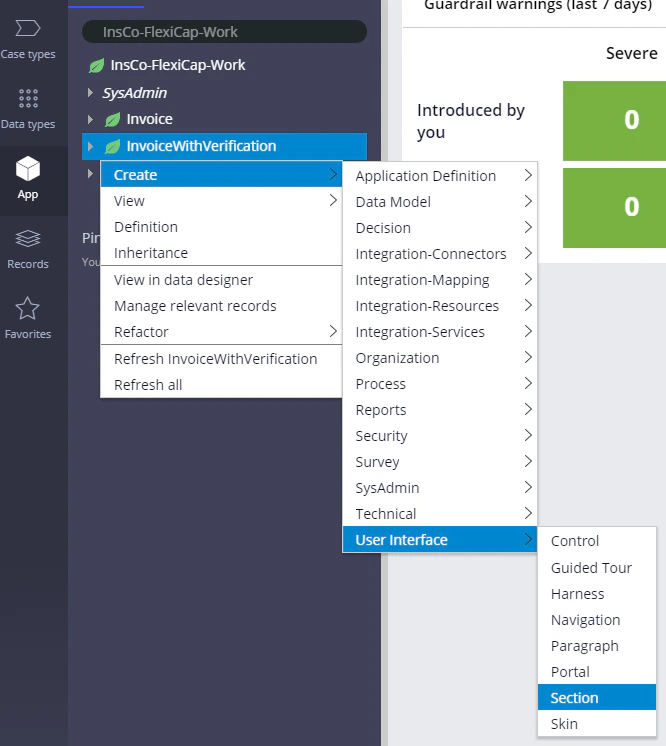
On the **App** tab, click **Create → User Interface → Section**.
## Create the pyCaseInformation section
A section is what displays the data received from ABBYY FlexiCapture in a Pega case.
On the **App** tab, click **Create → User Interface → Section**.
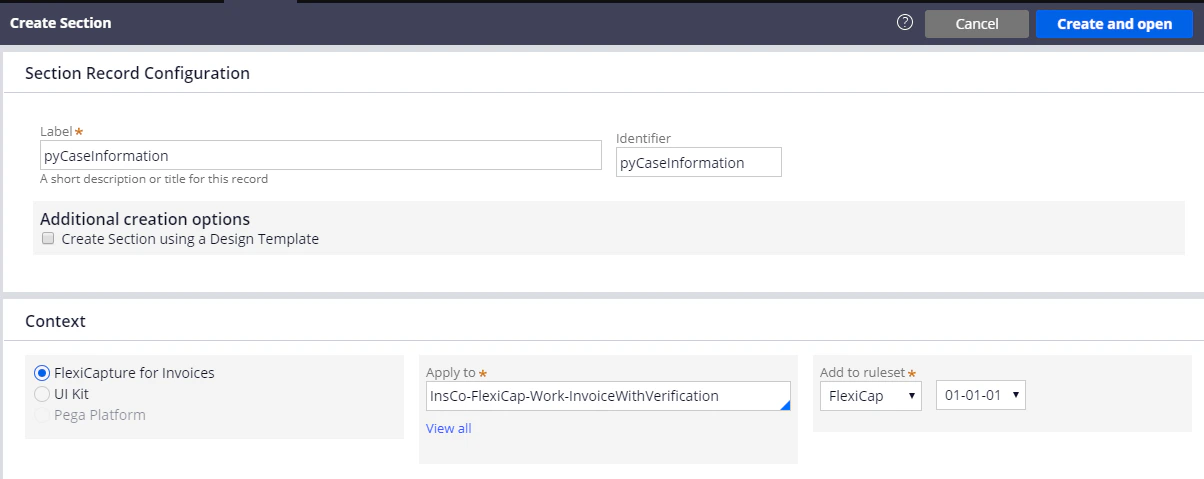
 1. In the **Label** and **Identifier** fields, enter `pyCaseInformation`.
2. Make sure that the section is being created within the context of the application.
3. Make sure that the full name of the case type is specified in the **Apply to** field.
4. Click **Create and open**.
1. In the **Label** and **Identifier** fields, enter `pyCaseInformation`.
2. Make sure that the section is being created within the context of the application.
3. Make sure that the full name of the case type is specified in the **Apply to** field.
4. Click **Create and open**.
 Open the section you created, click the **HTML** tab, and clear the **Auto-generated HTML** option.
In the **HTML Source** field, paste the code from the `pyCaseInformation.html` file, which is in this folder:
```text theme={null}
%Installation Path%\Connector for FlexiCapture as a Service with verification\Samples\Code examples\Configure UI\Single document
```
Open the section you created, click the **HTML** tab, and clear the **Auto-generated HTML** option.
In the **HTML Source** field, paste the code from the `pyCaseInformation.html` file, which is in this folder:
```text theme={null}
%Installation Path%\Connector for FlexiCapture as a Service with verification\Samples\Code examples\Configure UI\Single document
```