> ## Documentation Index
> Fetch the complete documentation index at: https://docs.abbyy.com/llms.txt
> Use this file to discover all available pages before exploring further.
# Install the Pega connector for the verification scenario
> Install the ABBYY FlexiCapture connector on a Pega server: import the JAR, create a library with packages and static variables, and define functions.
Installing the ABBYY FlexiCapture Connector for Pega takes three parts: importing the connector, creating a library, and creating the functions that call it.
Import the connector to the Pega server
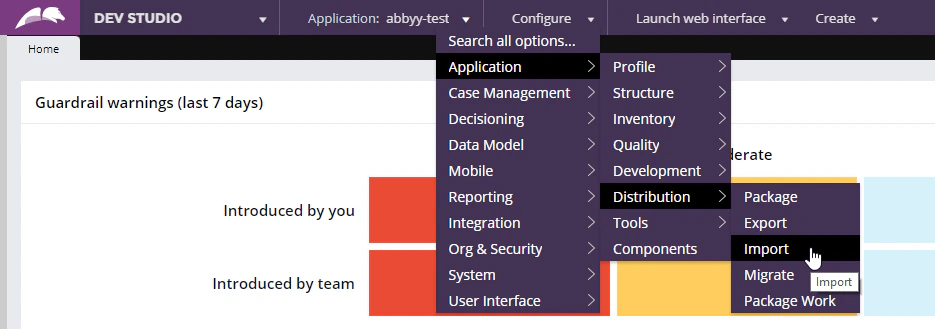
Open **Dev Studio** and click **Configure → Application → Distribution → Import**.
 Load the `abbyy.flexicapture.webapi.client.jar` file on to the server.
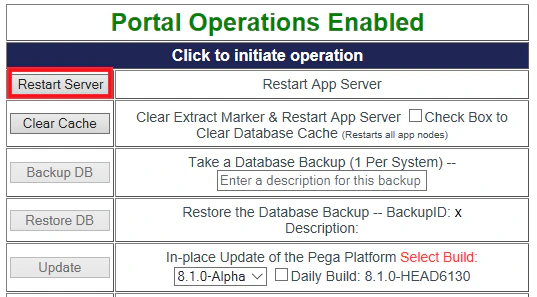
Open the **Pega Self-Service Portal** and click **Restart Server**.
Load the `abbyy.flexicapture.webapi.client.jar` file on to the server.
Open the **Pega Self-Service Portal** and click **Restart Server**.
Create a library
Click **Records → Technical → Library → Create**.
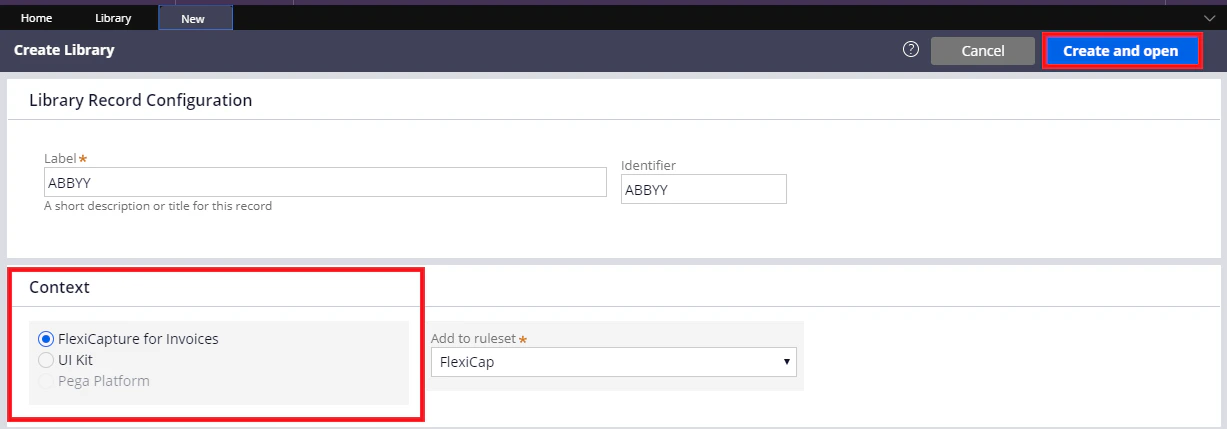
On the **Create Library** tab, specify a name for the library in the **Label** field, for example `ABBYY`, and fill in the **Identifier** field.
Make sure that the library is being created within the context of your application, and then click **Create and open**.
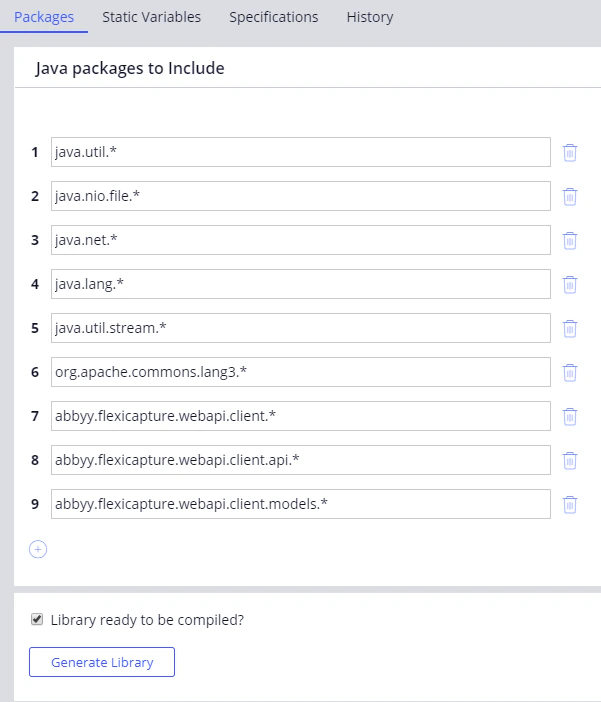
 On the **Packages** tab, add the following packages:
* `java.util.*`
* `java.nio.file.*`
* `java.net.*`
* `java.lang.*`
* `java.util.stream.*`
* `org.apache.commons.lang3.*`
* `abbyy.flexicapture.webapi.client.*`
* `abbyy.flexicapture.webapi.client.api.*`
* `abbyy.flexicapture.webapi.client.models.*`
On the **Packages** tab, add the following packages:
* `java.util.*`
* `java.nio.file.*`
* `java.net.*`
* `java.lang.*`
* `java.util.stream.*`
* `org.apache.commons.lang3.*`
* `abbyy.flexicapture.webapi.client.*`
* `abbyy.flexicapture.webapi.client.api.*`
* `abbyy.flexicapture.webapi.client.models.*`
 On the **Static Variables** tab, create the following string variables:
* `baseUri`
* `tenantName`
* `userName`
* `password`
* `multiFileProjectName`
* `singleFileProjectName`
On the **Static Variables** tab, create the following string variables:
* `baseUri`
* `tenantName`
* `userName`
* `password`
* `multiFileProjectName`
* `singleFileProjectName`
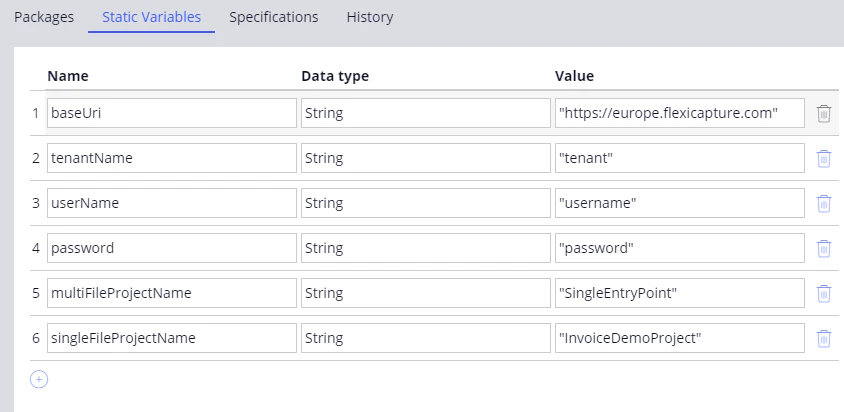 Click **Save**, and then click **Generate Library**.
Create a function
A function holds Java code that runs when the function is called from other Pega objects. Specify the input and output parameters on the **Parameters** tab, and the exceptions on the **Imports & Exceptions** tab.
Click **Records → Technical → Function → Create** and fill in the **Label** and **Identifier** fields.
In the **Library** field, specify the name of the library you created earlier.
In the **Parameters** section, specify the following two input parameters:
| Name | Java type |
| --------------- | --------- |
| `FileName` | `String` |
| `Base64Content` | `String` |
Make sure that the function is being created within the context of your application, and then click **Create and open**.
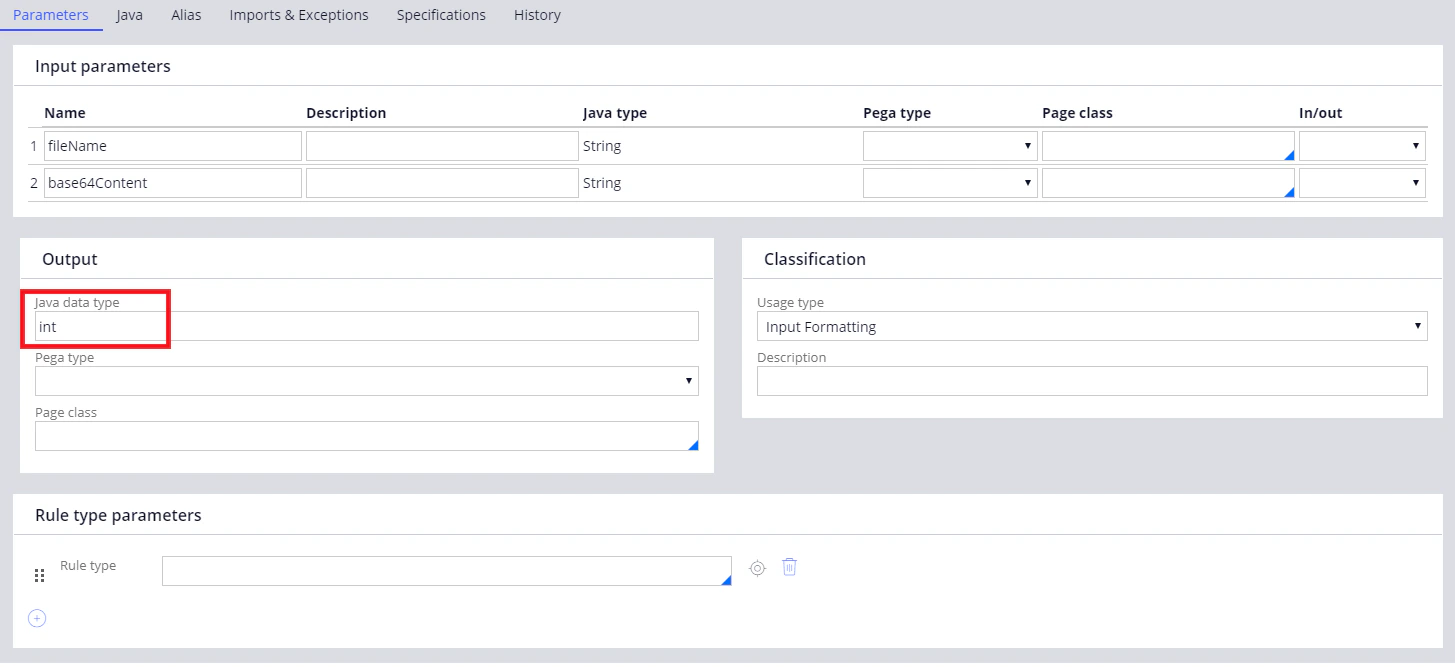
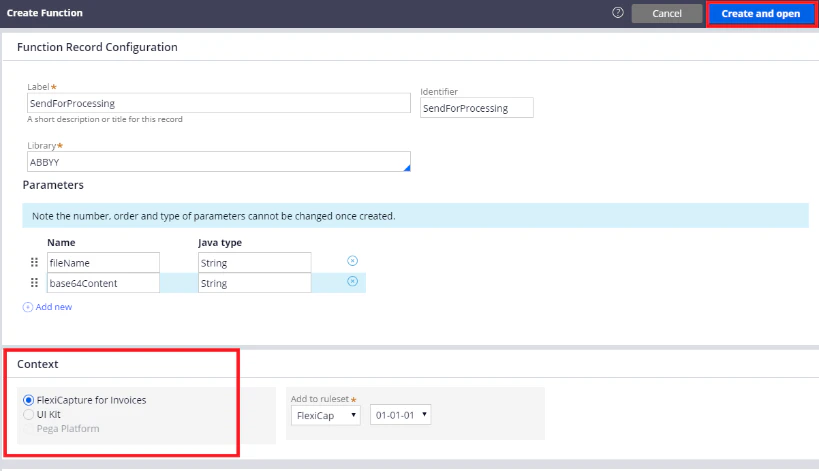 In the window that opens, on the **Parameters** tab, specify `int`, `string`, or `boolean` as the data type in the **Java data type** field.
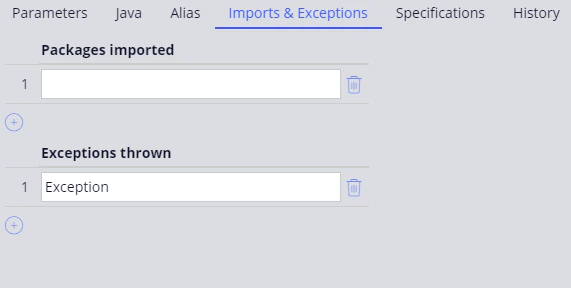
 Click the **Imports & Exceptions** tab and type `Exception` in the **Exceptions thrown** section.
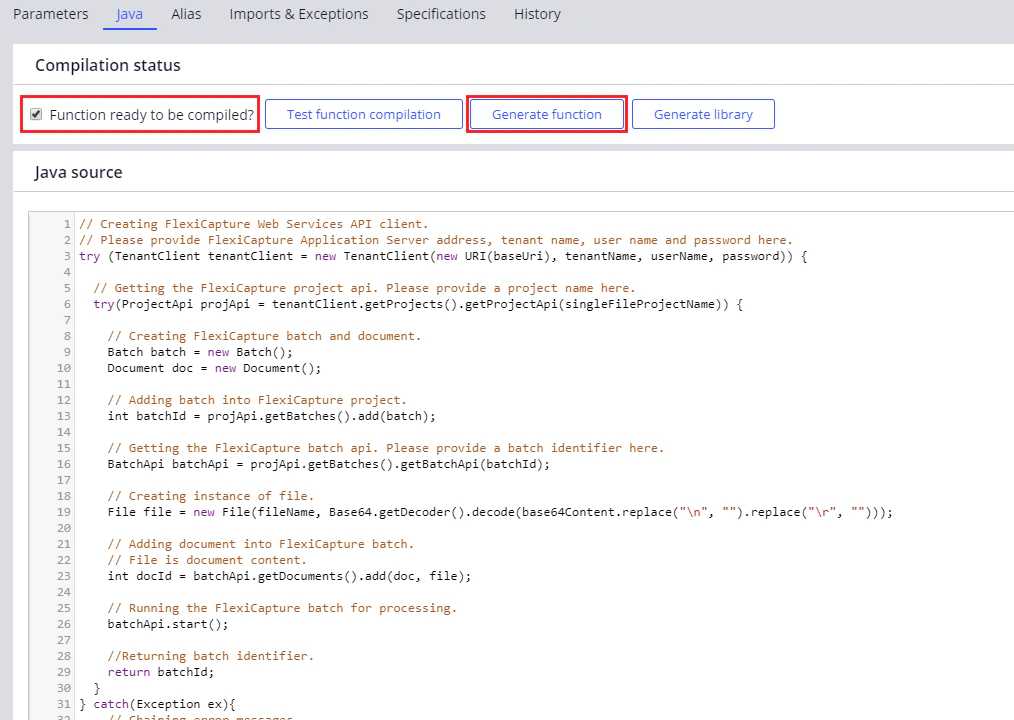
 Go back to the **Java** tab and insert the code for the function in the **Java source** field. Select the **Function ready to be compiled?** option, save your changes, and then click **Generate function**.
 ## Where the function code comes from
Copy the code for each function from the Java file in this folder:
```text theme={null}
%Installation Path%\Connector for FlexiCapture as a Service with verification\Samples\Code examples\Pega Functions
```
The functions each scenario needs are listed in [Create the functions for single-document processing](/flexi-capture/connectors/pega/pega-func-one-doc) and [Create the functions for multi-document processing](/flexi-capture/connectors/pega/pega-func-multiple-docs), along with the general functions in [Create the general functions](/flexi-capture/connectors/pega/pega-func-other).
## Next steps
For the full sequence of steps for your scenario, see [ABBYY FlexiCapture as a service with verification](/flexi-capture/connectors/pega-fc-as-service-verification).
## Where the function code comes from
Copy the code for each function from the Java file in this folder:
```text theme={null}
%Installation Path%\Connector for FlexiCapture as a Service with verification\Samples\Code examples\Pega Functions
```
The functions each scenario needs are listed in [Create the functions for single-document processing](/flexi-capture/connectors/pega/pega-func-one-doc) and [Create the functions for multi-document processing](/flexi-capture/connectors/pega/pega-func-multiple-docs), along with the general functions in [Create the general functions](/flexi-capture/connectors/pega/pega-func-other).
## Next steps
For the full sequence of steps for your scenario, see [ABBYY FlexiCapture as a service with verification](/flexi-capture/connectors/pega-fc-as-service-verification).