> ## Documentation Index
> Fetch the complete documentation index at: https://docs.abbyy.com/llms.txt
> Use this file to discover all available pages before exploring further.
# Configuring and starting the components
> Configure the ABBYY FlexiCapture Multi-Task Package in UiPath: create Orchestrator queues and connection assets, and then launch the Batch Sender and Monitor.
## Creating UiPath Orchestrator queues
To create a UiPath Orchestrator queue:
1. Open the **Queues** tab in Orchestrator.
2. Create three queues with the following names: **Monitor Queue**, **Verifier Queue**, and **Fetcher Queue**. During the creation process, select the following options: **Unique Reference**: **Yes** and **Auto Retry**: **No**.
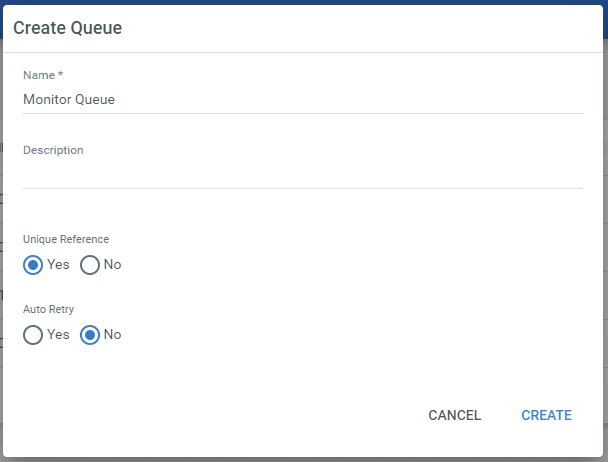 To modify the queue names, follow the steps outlined in [Customizing queue names](/flexi-capture/connectors/ui-path/up-queues-customization).
## Creating UiPath assets
UiPath Orchestrator assets and credentials are used in UiPath processes to store settings for connecting to FC 12.
To create UiPath assets:
1. Log in to Orchestrator as an administrator.
2. Go to the **Assets** tab.
3. Create the following **Text**-type assets:
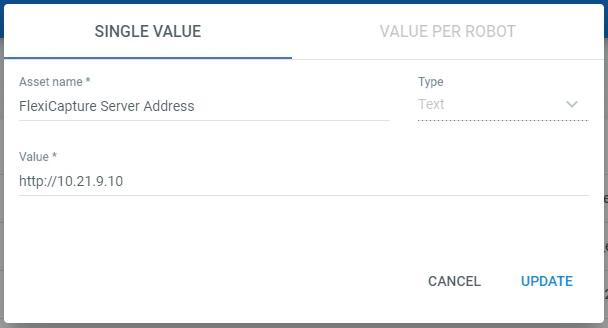
* **FlexiCapture Server Address**. Specify the FC Application Server address as this asset's **Value**.
To modify the queue names, follow the steps outlined in [Customizing queue names](/flexi-capture/connectors/ui-path/up-queues-customization).
## Creating UiPath assets
UiPath Orchestrator assets and credentials are used in UiPath processes to store settings for connecting to FC 12.
To create UiPath assets:
1. Log in to Orchestrator as an administrator.
2. Go to the **Assets** tab.
3. Create the following **Text**-type assets:
* **FlexiCapture Server Address**. Specify the FC Application Server address as this asset's **Value**.
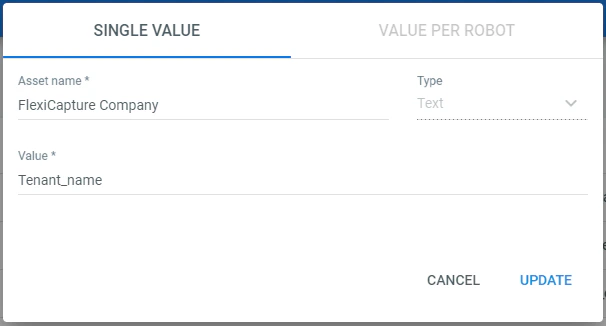
 * **FlexiCapture Company** (optional) – name of the tenant (company) on the FC Application Server. Create this asset if you are using FlexiCapture Cloud or a local multi-tenant system.
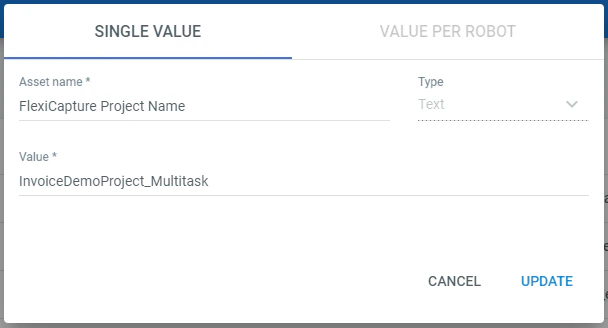
 * **FlexiCapture Project Name**. For this asset's Value, specify the name of the project that you will be using to process documents. For more information about setting up and uploading a project to a server, see [Configuring a FlexiCapture project](/flexi-capture/connectors/ui-path/up-configuring-fc).
 4. Create the credentials. To do this, create a **Credential**-type asset and name it **FlexiCapture Credentials**. Fill out the **Username** and **Password** fields with the FC user name and password.
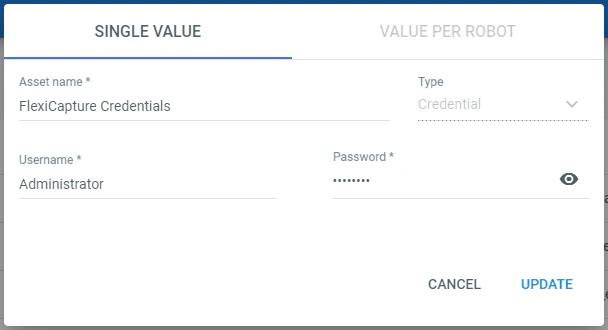 The user specified in the FC asset should either have both the Scanning Operator and the Verification operator roles, or the Administrator role. Access rights must be set up by a FC administrator using the Administration and Monitoring Console. For more information about setting up access rights, see [Managing user accounts](/flexi-capture/web-stations/monitoring-console/users).
## Launching the Batch Sender, Batch Monitor, Batch Verifier, and Batch Fetcher processes
Before launching the processes, make sure that the appropriate [queues](#queues) and [assets](#assets) have been created in Orchestrator and that the [FlexiCapture project has been uploaded to the ABBYY FlexiCapture Application Server and set up correctly](/flexi-capture/connectors/ui-path/up-configuring-fc).
At least two UiPath Robots will also be needed to launch the processes. One of the robots should always be running the **Batch Monitor** process, while the other robot (or several others) should be used to launch the **Batch Sender**, **Batch Verifier**, and **Batch Fetcher** processes.
You can create robots on different machines. Or you can [create robots on a single machine](https://robot.uipath.com/docs/setting-up-windows-server-for-high-density-robots) that has the Windows Server Operating System.
1. [Create](https://orchestrator.uipath.com/docs/managing-robots) two standard robots, one of which will be of the **Unattended** type.
2. [Publish](https://studio.uipath.com/docs/about-publishing-automation-projects) the **Batch Monitor**, **Batch Sender**, **Batch Verifier**, and **Batch Fetcher** processes to Orchestrator.
3. For each published package, [deploy the process](https://orchestrator.uipath.com/docs/managing-processes) in the same environment, of which the created robots are part.
The user specified in the FC asset should either have both the Scanning Operator and the Verification operator roles, or the Administrator role. Access rights must be set up by a FC administrator using the Administration and Monitoring Console. For more information about setting up access rights, see [Managing user accounts](/flexi-capture/web-stations/monitoring-console/users).
## Launching the Batch Sender, Batch Monitor, Batch Verifier, and Batch Fetcher processes
Before launching the processes, make sure that the appropriate [queues](#queues) and [assets](#assets) have been created in Orchestrator and that the [FlexiCapture project has been uploaded to the ABBYY FlexiCapture Application Server and set up correctly](/flexi-capture/connectors/ui-path/up-configuring-fc).
At least two UiPath Robots will also be needed to launch the processes. One of the robots should always be running the **Batch Monitor** process, while the other robot (or several others) should be used to launch the **Batch Sender**, **Batch Verifier**, and **Batch Fetcher** processes.
You can create robots on different machines. Or you can [create robots on a single machine](https://robot.uipath.com/docs/setting-up-windows-server-for-high-density-robots) that has the Windows Server Operating System.
1. [Create](https://orchestrator.uipath.com/docs/managing-robots) two standard robots, one of which will be of the **Unattended** type.
2. [Publish](https://studio.uipath.com/docs/about-publishing-automation-projects) the **Batch Monitor**, **Batch Sender**, **Batch Verifier**, and **Batch Fetcher** processes to Orchestrator.
3. For each published package, [deploy the process](https://orchestrator.uipath.com/docs/managing-processes) in the same environment, of which the created robots are part.
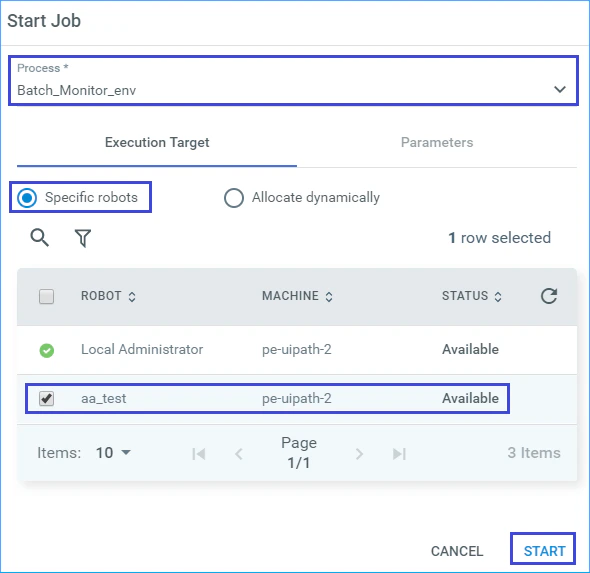
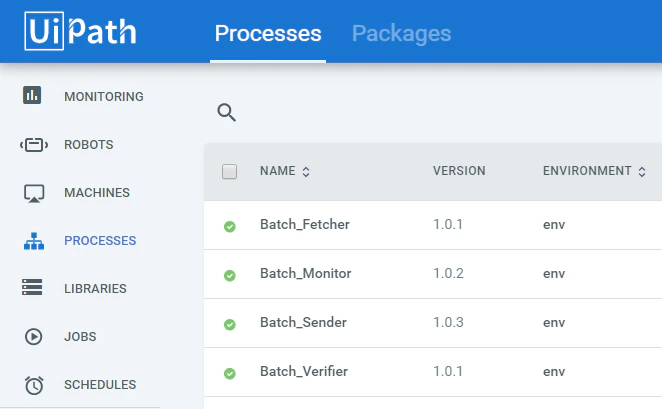 4. Go to the **Jobs** tab in Orchestrator. Create a new Job for the **Batch Monitor** process and set it up to execute an Unattended-type robot.
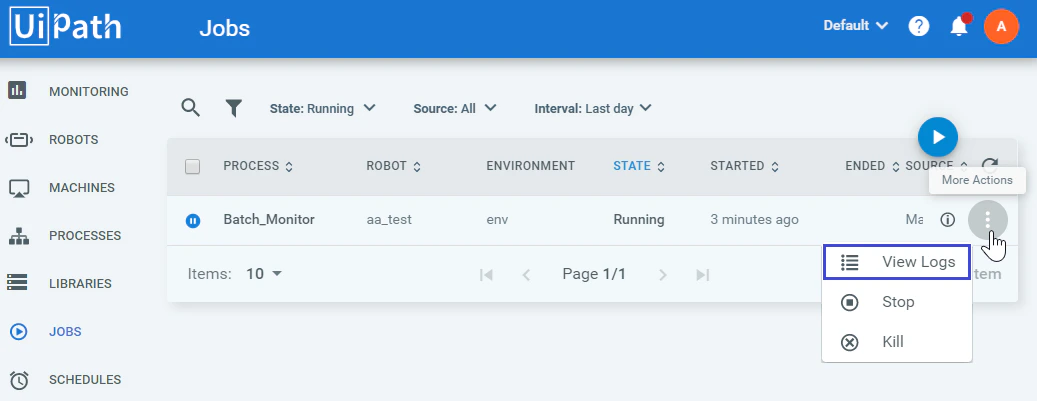
 The **Batch Monitor** process will be launched using the specified robot and its Job will now have the **Running** status. To see the process logs, go to **More Actions → View Logs**.
 5. Next, launch **Batch Sender** on a different robot. This process will send files from the selected folder to FC for processing. You can also launch **Batch Sender** using the Orchestrator **Jobs** tab, UiPath Studio, or the [system tray of the robot's machine](https://robot.uipath.com/docs/the-user-interface).
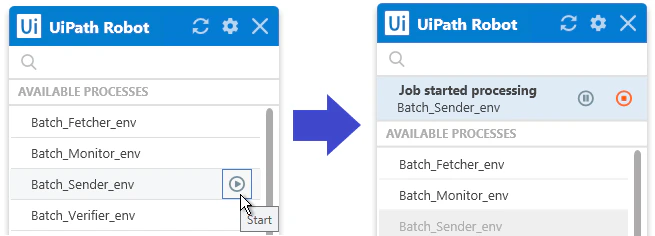 6. Wait until document processing has finished. If the batches have been processed successfully, the status of the transaction in the **Monitor Queue** will be changed to **Successful** and new transactions will appear in the **Batch Fetcher** queue.
7. Launch the **Batch Fetcher** process to download the batch processing results. The status of the transaction in **Fetcher Queue** will be changed to **Successful**.
8. If the sent batch reaches the verification stage in FC, the **Batch Monitor** process will create a transaction using the batch's ID in **Verifier Queue**. If transactions with the *New* status exist in this queue, launch the **Batch Verifier** process to get a batch verification URL. After that, verify the document data and complete the verification task.
After that, the batches will be exported and moved to the *Processed* stage. **Batch Monitor** will change the status of the appropriate transactions in **Monitor Queue** to *Successful* and add new transactions to **Fetcher Queue**.
To download the processing results for verified batches, launch the **Batch Fetcher** process for each **Fetcher Queue** transaction.
## Launching Batch Processor – single process
Before launching the process, make sure that the [FlexiCapture project has been uploaded to the ABBYY FlexiCapture Application Server and set up correctly](/flexi-capture/connectors/ui-path/up-configuring-fc). The **InvoiceDemoProject\_Multitask** test project can also be uploaded to the server from the connector installation directory located in **\Multi-task package\Samples\FlexiCapture Projects**.
1. Open **Batch Processor – single process** in UiPath Studio.
2. Open the **Variables** tab.
3. Specify the settings for connecting to FC using the following variables:
*FlexiCaptureServerUrl*, *FlexiCaptureCompany*, *FlexiCaptureUsername*, *FlexiCapturePassword*, *FlexiCaptureProject,* and *FlexiCaptureBatchType*.
For the **InvoiceDemoProject\_Multitask** project, the following can be specified in the *FlexiCaptureBatchType* variable:
* The **Unattended service** value — for demonstrating a verification-less processing scenario.
* The **Attended service** value — for demonstrating a processing scenario with verification.
4. Create a new folder on your local machine and copy several images from the FC project's **Images** folder to this new folder.
5. Go to the **Design** tab in UiPath Studio and click **Run**.
6. Once the process has been launched, specify the folder where you have placed the image samples. Files from that folder will be sent to FC for processing.
7. Wait until file recognition has finished. Next, do the following (depending on the chosen scenario):
* Choose a folder where the processing results will be saved.
or
* Complete the verification, and after that choose a folder where the processing results will be saved.
6. Wait until document processing has finished. If the batches have been processed successfully, the status of the transaction in the **Monitor Queue** will be changed to **Successful** and new transactions will appear in the **Batch Fetcher** queue.
7. Launch the **Batch Fetcher** process to download the batch processing results. The status of the transaction in **Fetcher Queue** will be changed to **Successful**.
8. If the sent batch reaches the verification stage in FC, the **Batch Monitor** process will create a transaction using the batch's ID in **Verifier Queue**. If transactions with the *New* status exist in this queue, launch the **Batch Verifier** process to get a batch verification URL. After that, verify the document data and complete the verification task.
After that, the batches will be exported and moved to the *Processed* stage. **Batch Monitor** will change the status of the appropriate transactions in **Monitor Queue** to *Successful* and add new transactions to **Fetcher Queue**.
To download the processing results for verified batches, launch the **Batch Fetcher** process for each **Fetcher Queue** transaction.
## Launching Batch Processor – single process
Before launching the process, make sure that the [FlexiCapture project has been uploaded to the ABBYY FlexiCapture Application Server and set up correctly](/flexi-capture/connectors/ui-path/up-configuring-fc). The **InvoiceDemoProject\_Multitask** test project can also be uploaded to the server from the connector installation directory located in **\Multi-task package\Samples\FlexiCapture Projects**.
1. Open **Batch Processor – single process** in UiPath Studio.
2. Open the **Variables** tab.
3. Specify the settings for connecting to FC using the following variables:
*FlexiCaptureServerUrl*, *FlexiCaptureCompany*, *FlexiCaptureUsername*, *FlexiCapturePassword*, *FlexiCaptureProject,* and *FlexiCaptureBatchType*.
For the **InvoiceDemoProject\_Multitask** project, the following can be specified in the *FlexiCaptureBatchType* variable:
* The **Unattended service** value — for demonstrating a verification-less processing scenario.
* The **Attended service** value — for demonstrating a processing scenario with verification.
4. Create a new folder on your local machine and copy several images from the FC project's **Images** folder to this new folder.
5. Go to the **Design** tab in UiPath Studio and click **Run**.
6. Once the process has been launched, specify the folder where you have placed the image samples. Files from that folder will be sent to FC for processing.
7. Wait until file recognition has finished. Next, do the following (depending on the chosen scenario):
* Choose a folder where the processing results will be saved.
or
* Complete the verification, and after that choose a folder where the processing results will be saved.