> ## Documentation Index
> Fetch the complete documentation index at: https://docs.abbyy.com/llms.txt
> Use this file to discover all available pages before exploring further.
# Sample 1. Step 19: Describe the ANY TEXT field
> Search for the unnamed ANY TEXT field in Sample 1 with a Paragraph element and a horizontal White Gap that separates the text from the barcode.
The **ANY TEXT** field at the bottom of the document has no fixed name. Its name is unique on each document, so you cannot search for it by name. Locate it by its position relative to other elements instead.
First, try the existing **IdentityNumber** element. On all the test images, the **ANY TEXT** field appears below it.
Do not use the separators that appear on some images. They are not consistent or reliable elements. For more information, see [Step 6](/flexi-capture/fls/tutorial/step6).
## Search below the IdentityNumber element
Create a [Paragraph](/flexi-capture/fls/template/text-chain) element named **TextField** for the **ANY TEXT** field.
On the **Relations** tab, set the **TextField** element's location to **Below** the **IdentityNumber** element.
Match the FlexiLayout with the test images. On some images the hypothesis also includes barcode digits, so describe the location of the **ANY TEXT** field more precisely.
## Refine the search with a White Gap element
Add a horizontal **White Gap** element for the gap between the text and the barcode, and use it as the reference element for the **ANY TEXT** field.
Create a [White Gap](/flexi-capture/fls/template/white-gap) element named **BetweenGap**. Place it above the **TextField** element in the tree of elements.
On the **White Gap** tab, set the orientation of **BetweenGap** to **Horizontal**.
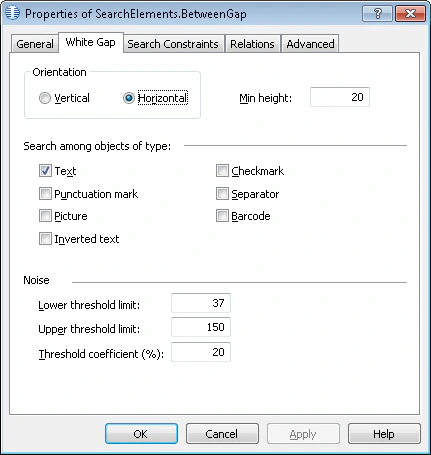 On the **Relations** tab, set the search area to the region below the **IdentityNumber** element, no farther than 200 dots from the bottom boundary of the **BarcodeHeader** element.
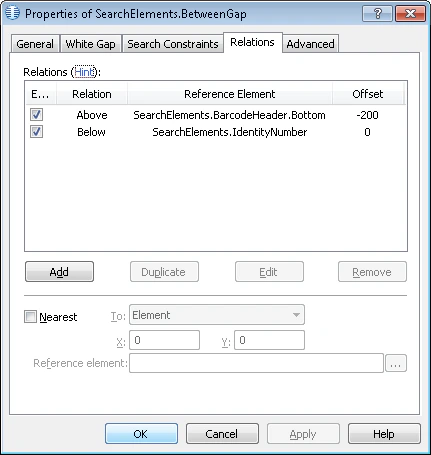 On the **Relations** tab, set the **TextField** element's location to **Below** the **BetweenGap** element, with **Offset** = 0.
Match the FlexiLayout with all the test images. The hypothesis for the **TextField** element no longer contains unwanted data, so the **BetweenGap** element reliably locates the **TextField** element.
## Create the TextField block
Create a **Text** block named **TextField** and specify the **TextField** element as the source element.
On the **Relations** tab, set the **TextField** element's location to **Below** the **BetweenGap** element, with **Offset** = 0.
Match the FlexiLayout with all the test images. The hypothesis for the **TextField** element no longer contains unwanted data, so the **BetweenGap** element reliably locates the **TextField** element.
## Create the TextField block
Create a **Text** block named **TextField** and specify the **TextField** element as the source element.