> ## Documentation Index
> Fetch the complete documentation index at: https://docs.abbyy.com/llms.txt
> Use this file to discover all available pages before exploring further.
# Sample 1. Step 20: Describe the YOUR PHOTO IN FANCY DRESS field
> Extract the YOUR PHOTO IN FANCY DRESS field in Sample 1 by grouping an Object Collection and four Separator elements in a compound Photo element.
As noted in [Step 6](/flexi-capture/fls/tutorial/step6), not all the parts of the photo on images 1 and 6 were recognized as image objects of type **Picture**.
To capture the full photo, FlexiLayout Studio must find all the **Image Object** types in the photo area.
Group all the photo elements into one compound **Photo** element. This also limits the number of hypotheses formulated.
## Contents of the Photo Group element
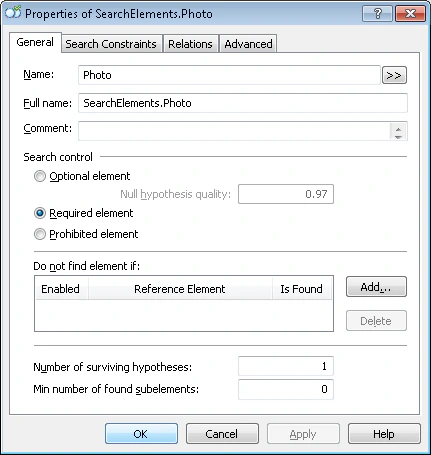 The **Photo** Group element includes:
* A **PhotoPicture** element of type **Object Collection** corresponding to the photo.
* A **PhotoHeader** element of type **Static Text** corresponding to the name **YOUR PHOTO IN FANCY DRESS**.
* Four separators around the photo that are required to find the **PhotoPicture** element.
## Create the PhotoHeader element
Because the name **YOUR PHOTO IN FANCY DRESS** occurs nowhere else in the document, add its element to the **Group** element first and use it to locate the separators.
Create a **Static Text** element named **PhotoHeader**, and give it the same settings as the other field names.
Match the FlexiLayout with the images. FlexiLayout Studio reliably detects the name on all of them.
## Create the separator elements
Create **Separator** elements for the four separators around the photo and give them the following names:
| Element | Separator |
| -------------- | --------------- |
| **USeparator** | Upper separator |
| **BSeparator** | Lower separator |
| **LSeparator** | Left separator |
| **RSeparator** | Right separator |
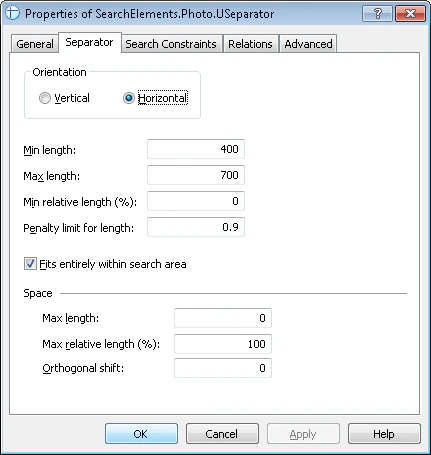
On the **Separator** tab in the **Properties** dialog box, specify the orientation of each of the four separators (**Vertical** or **Horizontal**). Do not change the other properties.
The **Photo** Group element includes:
* A **PhotoPicture** element of type **Object Collection** corresponding to the photo.
* A **PhotoHeader** element of type **Static Text** corresponding to the name **YOUR PHOTO IN FANCY DRESS**.
* Four separators around the photo that are required to find the **PhotoPicture** element.
## Create the PhotoHeader element
Because the name **YOUR PHOTO IN FANCY DRESS** occurs nowhere else in the document, add its element to the **Group** element first and use it to locate the separators.
Create a **Static Text** element named **PhotoHeader**, and give it the same settings as the other field names.
Match the FlexiLayout with the images. FlexiLayout Studio reliably detects the name on all of them.
## Create the separator elements
Create **Separator** elements for the four separators around the photo and give them the following names:
| Element | Separator |
| -------------- | --------------- |
| **USeparator** | Upper separator |
| **BSeparator** | Lower separator |
| **LSeparator** | Left separator |
| **RSeparator** | Right separator |
On the **Separator** tab in the **Properties** dialog box, specify the orientation of each of the four separators (**Vertical** or **Horizontal**). Do not change the other properties.
 ## Specify the search areas for the separators
Now use the test images to specify the search area for each of the separators.
### Upper separator (USeparator element)
* Below the photo caption but not farther than 100 dots from its top boundary (Below the **PhotoHeader** element and Above the **PhotoHeader**, Offset = -100).
* Within the area that is not longer than the caption by more than 80 dots on each side (Left of the right boundary of the **PhotoHeader** element, Offset = -80, Reference boundary = right, and Right of the left boundary of the **PhotoHeader** element, Offset = -80, Reference boundary = left).
### Lower separator (BSeparator element)
* Below the name of the **NAME** field (Below the **NameHeader** element).
* Above the bottom of **IdentityNumber** (Above the **IdentityNumber** element, ElementBoundary = bottom).
* Within the area that is not longer than the name by more than 80 dots on each side (Left of the right boundary of the **PhotoHeader** element, Offset = -80, Reference boundary = right, and Right of the left boundary of the **PhotoHeader** element, Offset = -80, Reference boundary = left).
### Left separator (LSeparator element)
* Within the area that is not wider than the distance between the upper and lower separators by more than 50 dots on each side (Below the **USeparator** element, Offset = -50, and Above the **BSeparator** element, Offset = -50).
* No farther than 40 dots from the left boundary of the upper separator (Right of the left boundary of the **USeparator** element, Offset = -20, Reference boundary = left, and Left of the left boundary of the **USeparator** element, Offset = -20, Reference boundary = left).
### Right separator (RSeparator element)
* Within the area that is not wider than the distance between the upper and lower separators by more than 50 dots on each side (Below the **USeparator** element, Offset = -50, and Above the **BSeparator** element, Offset = -50).
* No farther than 40 dots from the right boundary of the upper separator (Right of the right boundary of the **USeparator** element, Offset = -20, Reference boundary = right, and Left of the right boundary of the **USeparator** element, Offset = -20, Reference boundary = right).
Match the FlexiLayout with the images. FlexiLayout Studio can now detect these areas.
To check a search area, right-click a hypothesis in the **Tree of Hypotheses** and select **Show Search Area** on the shortcut menu. If the search criteria are wrong, you see the problem immediately. Even the search area of a correct hypothesis might need adjustment, for example if it is too small.
The maximum size of each separator was found by trial and error while studying the properties of **Separator** objects during pre-recognition.
## Create the PhotoPicture element and block
Name it **PhotoPicture**.
On the **Relations** tab, specify the search area for the **PhotoPicture** element:
* Below the upper separator (Below the **USeparator** element).
* Above the lower separator (Above the **BSeparator** element).
* To the right of the left separator (Right of the **LSeparator** element).
* To the left of the right separator (Left of the **RSeparator** element).
Create the **PhotoPicture** block and specify the **PhotoPicture** element as the source element.
## Specify the search areas for the separators
Now use the test images to specify the search area for each of the separators.
### Upper separator (USeparator element)
* Below the photo caption but not farther than 100 dots from its top boundary (Below the **PhotoHeader** element and Above the **PhotoHeader**, Offset = -100).
* Within the area that is not longer than the caption by more than 80 dots on each side (Left of the right boundary of the **PhotoHeader** element, Offset = -80, Reference boundary = right, and Right of the left boundary of the **PhotoHeader** element, Offset = -80, Reference boundary = left).
### Lower separator (BSeparator element)
* Below the name of the **NAME** field (Below the **NameHeader** element).
* Above the bottom of **IdentityNumber** (Above the **IdentityNumber** element, ElementBoundary = bottom).
* Within the area that is not longer than the name by more than 80 dots on each side (Left of the right boundary of the **PhotoHeader** element, Offset = -80, Reference boundary = right, and Right of the left boundary of the **PhotoHeader** element, Offset = -80, Reference boundary = left).
### Left separator (LSeparator element)
* Within the area that is not wider than the distance between the upper and lower separators by more than 50 dots on each side (Below the **USeparator** element, Offset = -50, and Above the **BSeparator** element, Offset = -50).
* No farther than 40 dots from the left boundary of the upper separator (Right of the left boundary of the **USeparator** element, Offset = -20, Reference boundary = left, and Left of the left boundary of the **USeparator** element, Offset = -20, Reference boundary = left).
### Right separator (RSeparator element)
* Within the area that is not wider than the distance between the upper and lower separators by more than 50 dots on each side (Below the **USeparator** element, Offset = -50, and Above the **BSeparator** element, Offset = -50).
* No farther than 40 dots from the right boundary of the upper separator (Right of the right boundary of the **USeparator** element, Offset = -20, Reference boundary = right, and Left of the right boundary of the **USeparator** element, Offset = -20, Reference boundary = right).
Match the FlexiLayout with the images. FlexiLayout Studio can now detect these areas.
To check a search area, right-click a hypothesis in the **Tree of Hypotheses** and select **Show Search Area** on the shortcut menu. If the search criteria are wrong, you see the problem immediately. Even the search area of a correct hypothesis might need adjustment, for example if it is too small.
The maximum size of each separator was found by trial and error while studying the properties of **Separator** objects during pre-recognition.
## Create the PhotoPicture element and block
Name it **PhotoPicture**.
On the **Relations** tab, specify the search area for the **PhotoPicture** element:
* Below the upper separator (Below the **USeparator** element).
* Above the lower separator (Above the **BSeparator** element).
* To the right of the left separator (Right of the **LSeparator** element).
* To the left of the right separator (Left of the **RSeparator** element).
Create the **PhotoPicture** block and specify the **PhotoPicture** element as the source element.