> ## Documentation Index
> Fetch the complete documentation index at: https://docs.abbyy.com/llms.txt
> Use this file to discover all available pages before exploring further.
# Sample 3. Step 6: Detect the name of the Invoice Number field with the kwInvoiceNumber element
> Create a required kwInvoiceNumber Static Text element that finds the Invoice Number field name and identifies the document type in ABBYY FlexiCapture.
The name of the **Invoice Number** field occurs on all the images and distinguishes this document type from others. When processing semi-structured documents in ABBYY FlexiCapture, avoid accidental recognition of documents that do not belong to the selected type. One way to identify a document is to create at least one [required element](/flexi-capture/fls/glossary/glossary-main-body#r). Mark this element as required, and use it as an identifier for this document type.
On some images this name is written as `Invoice No.`, and on others as `Credit note no.` The search string must include both variants. Specify each string without spaces, so the maximum number of errors applies to the entire phrase, not to separate words.
## Create the kwInvoiceNumber element
In the **InvoiceHeader** element, create a [Static Text](/flexi-capture/fls/template/static-text) element and name it **kwInvoiceNumber**.
On the **General** tab, select **Required element**.
Click the **Static Text** tab. In the **Search text** field, enter `InvoiceNo.|CreditNoteNo`.
Set **Max error percentage** to 20.
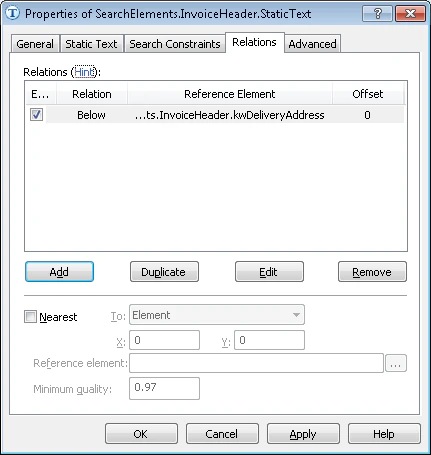
Click the **Relations** tab. The keywords of the **Invoice Number** field name can occur only below the **Delivery Address** field name, so set this relation:
* **Below** the `InvoiceHeader.kwDeliveryAddress` element, **Offset** = 0
 Click the **Advanced** tab. Since the **Delivery Address** field is in the upper third and in the left third of the image, set this [additional search constraint](/flexi-capture/fls/template/advanced-constraints) in the **Advanced pre-search relations** field: look for the object in the left third of the image and in the upper third of the image. In the [FlexiLayout language](/flexi-capture/fls/code/general-code):
```text theme={null}
Above: PageRect.Top + PageRect.Height/3;
LeftOf: PageRect.Left + PageRect.Width/3;
```
Match the FlexiLayout with the test images and confirm that FlexiLayout Studio detects the element on all the images.
If a field name is worded differently from image to image, specify all the possible variants, or at least the majority of them. To learn the possible variants for this document type, ask for more test images or contact your customer.
Click the **Advanced** tab. Since the **Delivery Address** field is in the upper third and in the left third of the image, set this [additional search constraint](/flexi-capture/fls/template/advanced-constraints) in the **Advanced pre-search relations** field: look for the object in the left third of the image and in the upper third of the image. In the [FlexiLayout language](/flexi-capture/fls/code/general-code):
```text theme={null}
Above: PageRect.Top + PageRect.Height/3;
LeftOf: PageRect.Left + PageRect.Width/3;
```
Match the FlexiLayout with the test images and confirm that FlexiLayout Studio detects the element on all the images.
If a field name is worded differently from image to image, specify all the possible variants, or at least the majority of them. To learn the possible variants for this document type, ask for more test images or contact your customer.