> ## Documentation Index
> Fetch the complete documentation index at: https://docs.abbyy.com/llms.txt
> Use this file to discover all available pages before exploring further.

# OAuth 2.0 を使用した Gmail IMAP インポート設定

> OAuth 2.0 を使用して ABBYY FlexiCapture で Gmail IMAP インポートを設定する手順を説明します。Google にサインインし、メールボックスフォルダーを選択して、バッチ作成をテストします。

このセクションでは、IMAP 画像インポートプロファイルで OAuth 2.0 認証情報を使用して Gmail インポートを設定する方法について説明します。

OAuth 2.0 を使用して Gmail インポートを設定するには、次の手順を実行します。

1. プロジェクトを作成し、PreProd サーバーにアップロードします。

<img src="https://mintcdn.com/abbyy/M5jnw37NmJ-asKkj/images/flexi-capture/clip0012.png?fit=max&auto=format&n=M5jnw37NmJ-asKkj&q=85&s=de2cc3f5f2a2f976147b232b2b7df063" alt="" style={{display:"inline-block",verticalAlign:"middle",margin:0}} width="840" height="114" data-path="images/flexi-capture/clip0012.png" />

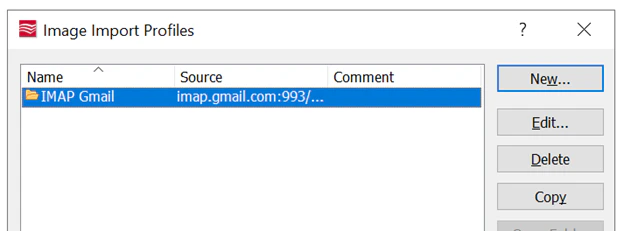
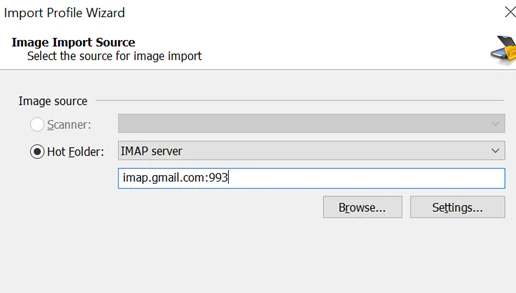
2. Gmail を使用する IMAP 画像インポートプロファイルを設定します。
<img src="https://mintcdn.com/abbyy/M5jnw37NmJ-asKkj/images/flexi-capture/clip0013.png?fit=max&auto=format&n=M5jnw37NmJ-asKkj&q=85&s=7f7a430a67a113720d58f4187bd02d6c" alt="" style={{display:"inline-block",verticalAlign:"middle",margin:0}} width="516" height="293" data-path="images/flexi-capture/clip0013.png" />

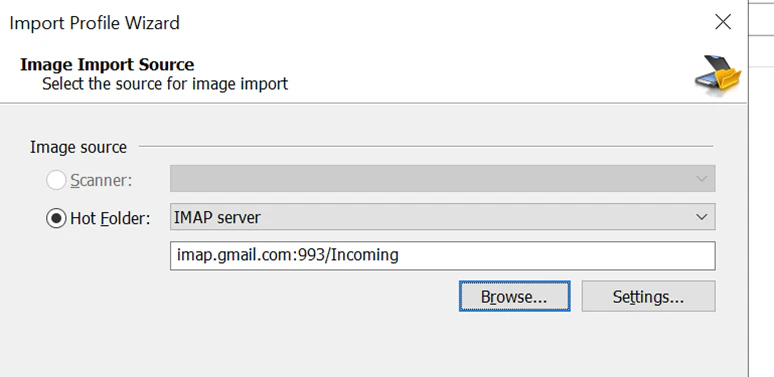
3. 画像インポートのソースを選択します。
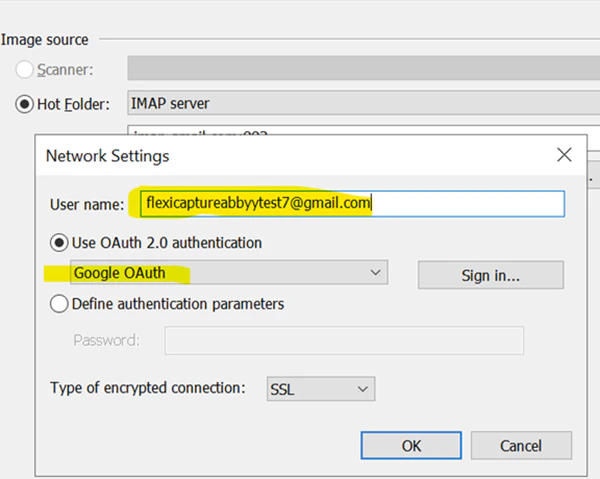
4. 画像インポートプロファイルの設定を開きます。
<img src="https://mintcdn.com/abbyy/M5jnw37NmJ-asKkj/images/flexi-capture/clip0009.png?fit=max&auto=format&n=M5jnw37NmJ-asKkj&q=85&s=eaf9f16ab892d3fd788d2add4eb10ff4" alt="" style={{display:"inline-block",verticalAlign:"middle",margin:0}} width="600" height="479" data-path="images/flexi-capture/clip0009.png" />

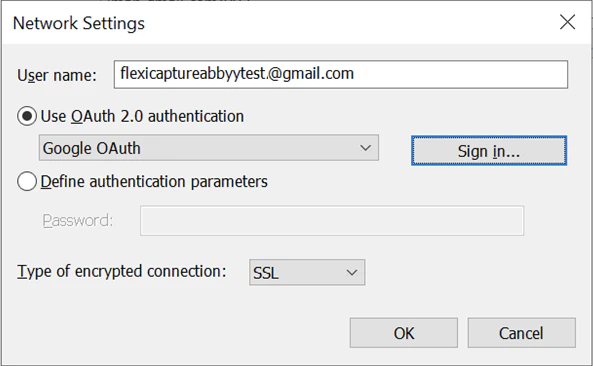
5. Gmail ID を入力します。
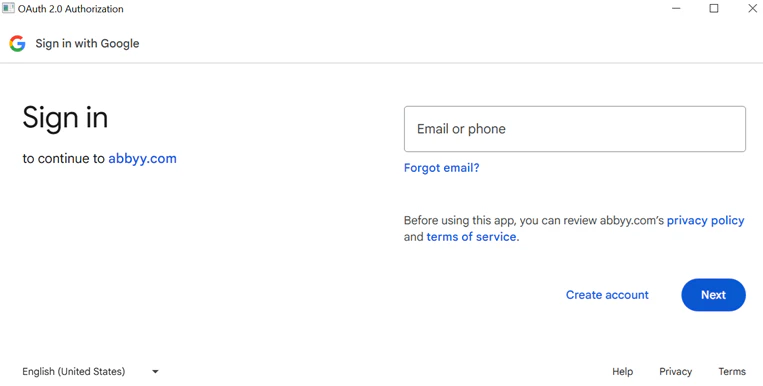
6. OAuth 認証を開始するには、\[Sign-in] をクリックします。Google OAuth ウィンドウが表示されます。
<img src="https://mintcdn.com/abbyy/M5jnw37NmJ-asKkj/images/flexi-capture/clip0014.png?fit=max&auto=format&n=M5jnw37NmJ-asKkj&q=85&s=1c0547fb7cf6a4df996e6ca82df553b2" alt="" style={{display:"inline-block",verticalAlign:"middle",margin:0}} width="763" height="386" data-path="images/flexi-capture/clip0014.png" />

7. Gmail アカウントを入力し、\[Next] をクリックします。
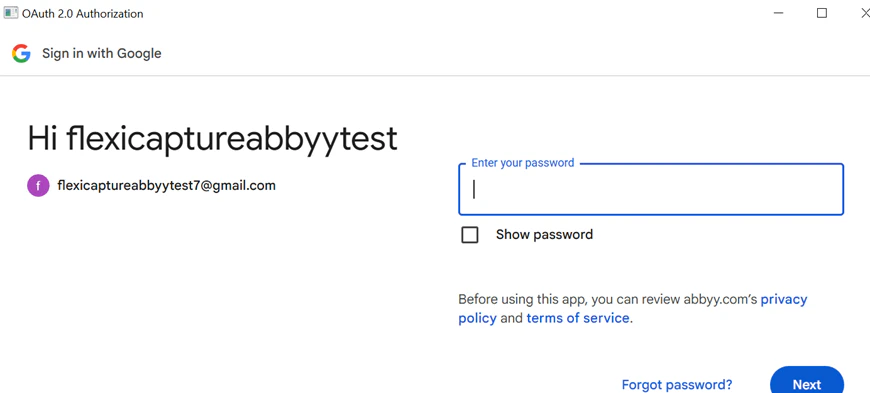
8. パスワードを入力します。
<img src="https://mintcdn.com/abbyy/M5jnw37NmJ-asKkj/images/flexi-capture/clip0007.png?fit=max&auto=format&n=M5jnw37NmJ-asKkj&q=85&s=fe2e55d715b2ec7652cd90ff0aad0b4c" alt="" style={{display:"inline-block",verticalAlign:"middle",margin:0}} width="870" height="393" data-path="images/flexi-capture/clip0007.png" />

9. 信頼に関するメッセージを確認し、**Continue** をクリックします。認証に成功すると、「*Thank you for allowing*」というメッセージが表示されます。OAuth のポップアップが閉じ、プロジェクト設定ステーションに戻ります。
<img src="https://mintcdn.com/abbyy/M5jnw37NmJ-asKkj/images/flexi-capture/clip0016.png?fit=max&auto=format&n=M5jnw37NmJ-asKkj&q=85&s=351d40ee288156d20deced56e4b86041" alt="" style={{display:"inline-block",verticalAlign:"middle",margin:0}} width="593" height="366" data-path="images/flexi-capture/clip0016.png" />

10. IMAP プロファイルの設定を完了します。
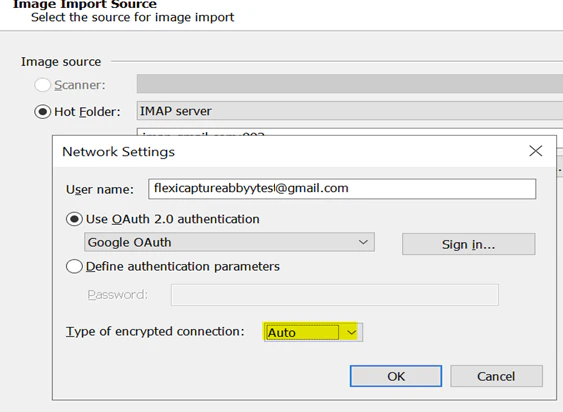
11. *Type of encrypted connection* を *Auto* に設定し、**OK** をクリックします。
<img src="https://mintcdn.com/abbyy/M5jnw37NmJ-asKkj/images/flexi-capture/clip0017.png?fit=max&auto=format&n=M5jnw37NmJ-asKkj&q=85&s=b2141a759cfd57ed75f175f1c71a0f59" alt="" style={{display:"inline-block",verticalAlign:"middle",margin:0}} width="563" height="412" data-path="images/flexi-capture/clip0017.png" />

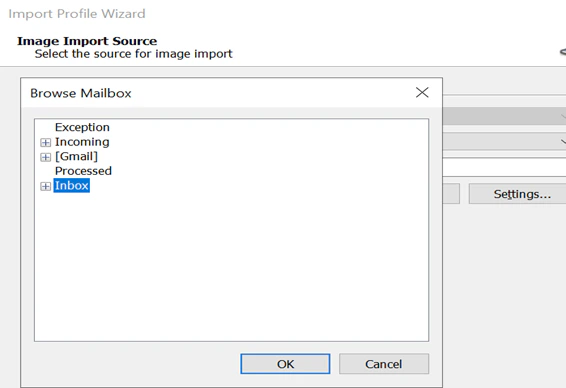
12. **Browse** をクリックして Gmail のフォルダー階層にアクセスします。
<img src="https://mintcdn.com/abbyy/M5jnw37NmJ-asKkj/images/flexi-capture/clip0004.png?fit=max&auto=format&n=M5jnw37NmJ-asKkj&q=85&s=9dd77c915bc1e208b34fbfcec91469f3" alt="" style={{display:"inline-block",verticalAlign:"middle",margin:0}} width="566" height="388" data-path="images/flexi-capture/clip0004.png" />

13. 処理対象のドキュメントが格納されるフォルダーを選択します。

<img src="https://mintcdn.com/abbyy/M5jnw37NmJ-asKkj/images/flexi-capture/clip0003.png?fit=max&auto=format&n=M5jnw37NmJ-asKkj&q=85&s=d25de5bacf37add1c90a4c330e79a88c" alt="" style={{display:"inline-block",verticalAlign:"middle",margin:0}} width="774" height="377" data-path="images/flexi-capture/clip0003.png" />

14. 残りの IMAP プロファイル設定を完了します。

<img src="https://mintcdn.com/abbyy/M5jnw37NmJ-asKkj/images/flexi-capture/clip0001.png?fit=max&auto=format&n=M5jnw37NmJ-asKkj&q=85&s=74e3b53d9bd68e33bb9e29f24bfa4024" alt="" style={{display:"inline-block",verticalAlign:"middle",margin:0}} width="631" height="231" data-path="images/flexi-capture/clip0001.png" />

15. *Admin & Monitoring Console* で、プロジェクトの **Hotfolder** トグルを有効にします。
16. インポートをテストするには、添付ファイル付きのメールを選択した Gmail フォルダーに送信します。
17. ドキュメントが処理され、バッチが正常に作成されたことを確認します。

<img src="https://mintcdn.com/abbyy/M5jnw37NmJ-asKkj/images/flexi-capture/clip0002.png?fit=max&auto=format&n=M5jnw37NmJ-asKkj&q=85&s=7f8f4ebaca3ec7fc4de51e36f5790de9" alt="" style={{display:"inline-block",verticalAlign:"middle",margin:0}} width="863" height="144" data-path="images/flexi-capture/clip0002.png" />