> ## Documentation Index
> Fetch the complete documentation index at: https://docs.abbyy.com/llms.txt
> Use this file to discover all available pages before exploring further.
# FlexiCapture REST APIインターフェイスを使用してアプリケーションを作成する
> 既存のクラウドプロジェクトに接続するアプリケーションをFlexiCapture Cloud REST API のWebポータルで作成し、ユーザーが文書処理タスクを実行できるようにします。
FlexiCapture Cloud REST APIインターフェイスのアプリケーションは、FlexiCapture Cloudテナント内の既存プロジェクトに接続されます。これにより、ユーザーは文書処理タスクを作成できるようになります。作成したタスクは、そのアプリケーションに接続されたFlexiCaptureプロジェクトで処理できます。
アプリケーションを作成するには、FlexiCapture Cloudユーザーテナントで次のロールの権限が付与されたFlexiCapture Cloudアカウントが必要です。
* Senior Verification Operator
* External User
ユーザーのロールの変更方法について詳しくは、[FlexiCapture Cloudアカウント権限の設定](/ja/flexi-capture/rest-api-apps-setup)セクションを参照してください。
ユーザーがアプリケーションを作成して使用するには、そのユーザーのFlexiCapture Cloudアカウントが削除または無効化されていない必要があります。
FlexiCapture Cloud REST API Webポータルでアプリケーションを作成するには:
アカウント情報を使用して、FlexiCapture Cloud REST API Webポータルにログインします。
**Applications**タブに移動し、**Add one more application**をクリックします。
 FlexiCapture Cloudテナント名と、そのテナントのアカウント情報を入力します。
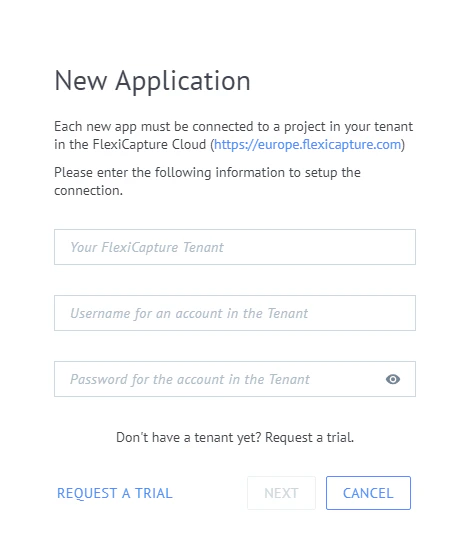 **Next**をクリックします。
適切なプロジェクトを選択し、アプリケーション名を入力します。
**Next**をクリックします。
適切なプロジェクトを選択し、アプリケーション名を入力します。
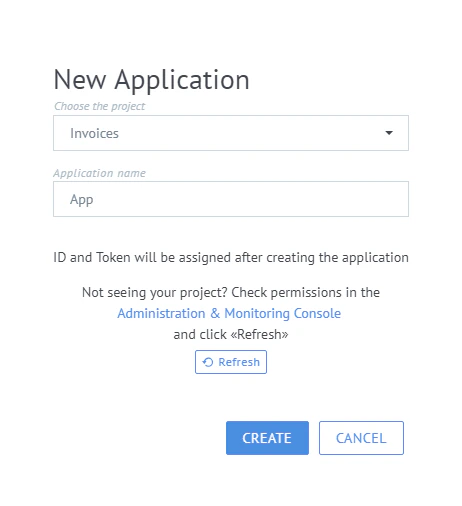 **Create**をクリックします。
アプリケーションが作成されると、WebポータルのDocument Captureセクションからタスクを送信する際に、アクティブなアプリケーションとして選択できるようになります。
**Create**をクリックします。
アプリケーションが作成されると、WebポータルのDocument Captureセクションからタスクを送信する際に、アクティブなアプリケーションとして選択できるようになります。