
This setup requires the Tenant Administrator role.
Connect an External Identity Provider to your tenant
1
Open the Identity Provider settings
In Vantage, click Configuration in the left pane, and then click Identity Provider.
2
Switch to External Identity Provider
In the top drop-down, select External Identity Provider.
3
Choose your protocol
In the Protocol field, select OAuth 2.0 or SAML 2.0. The settings panel updates with protocol-specific fields. See OAuth 2.0 fields or SAML 2.0 fields for details on each field.
4
Fill in the protocol-specific fields
Enter the values from the provider you prepared earlier.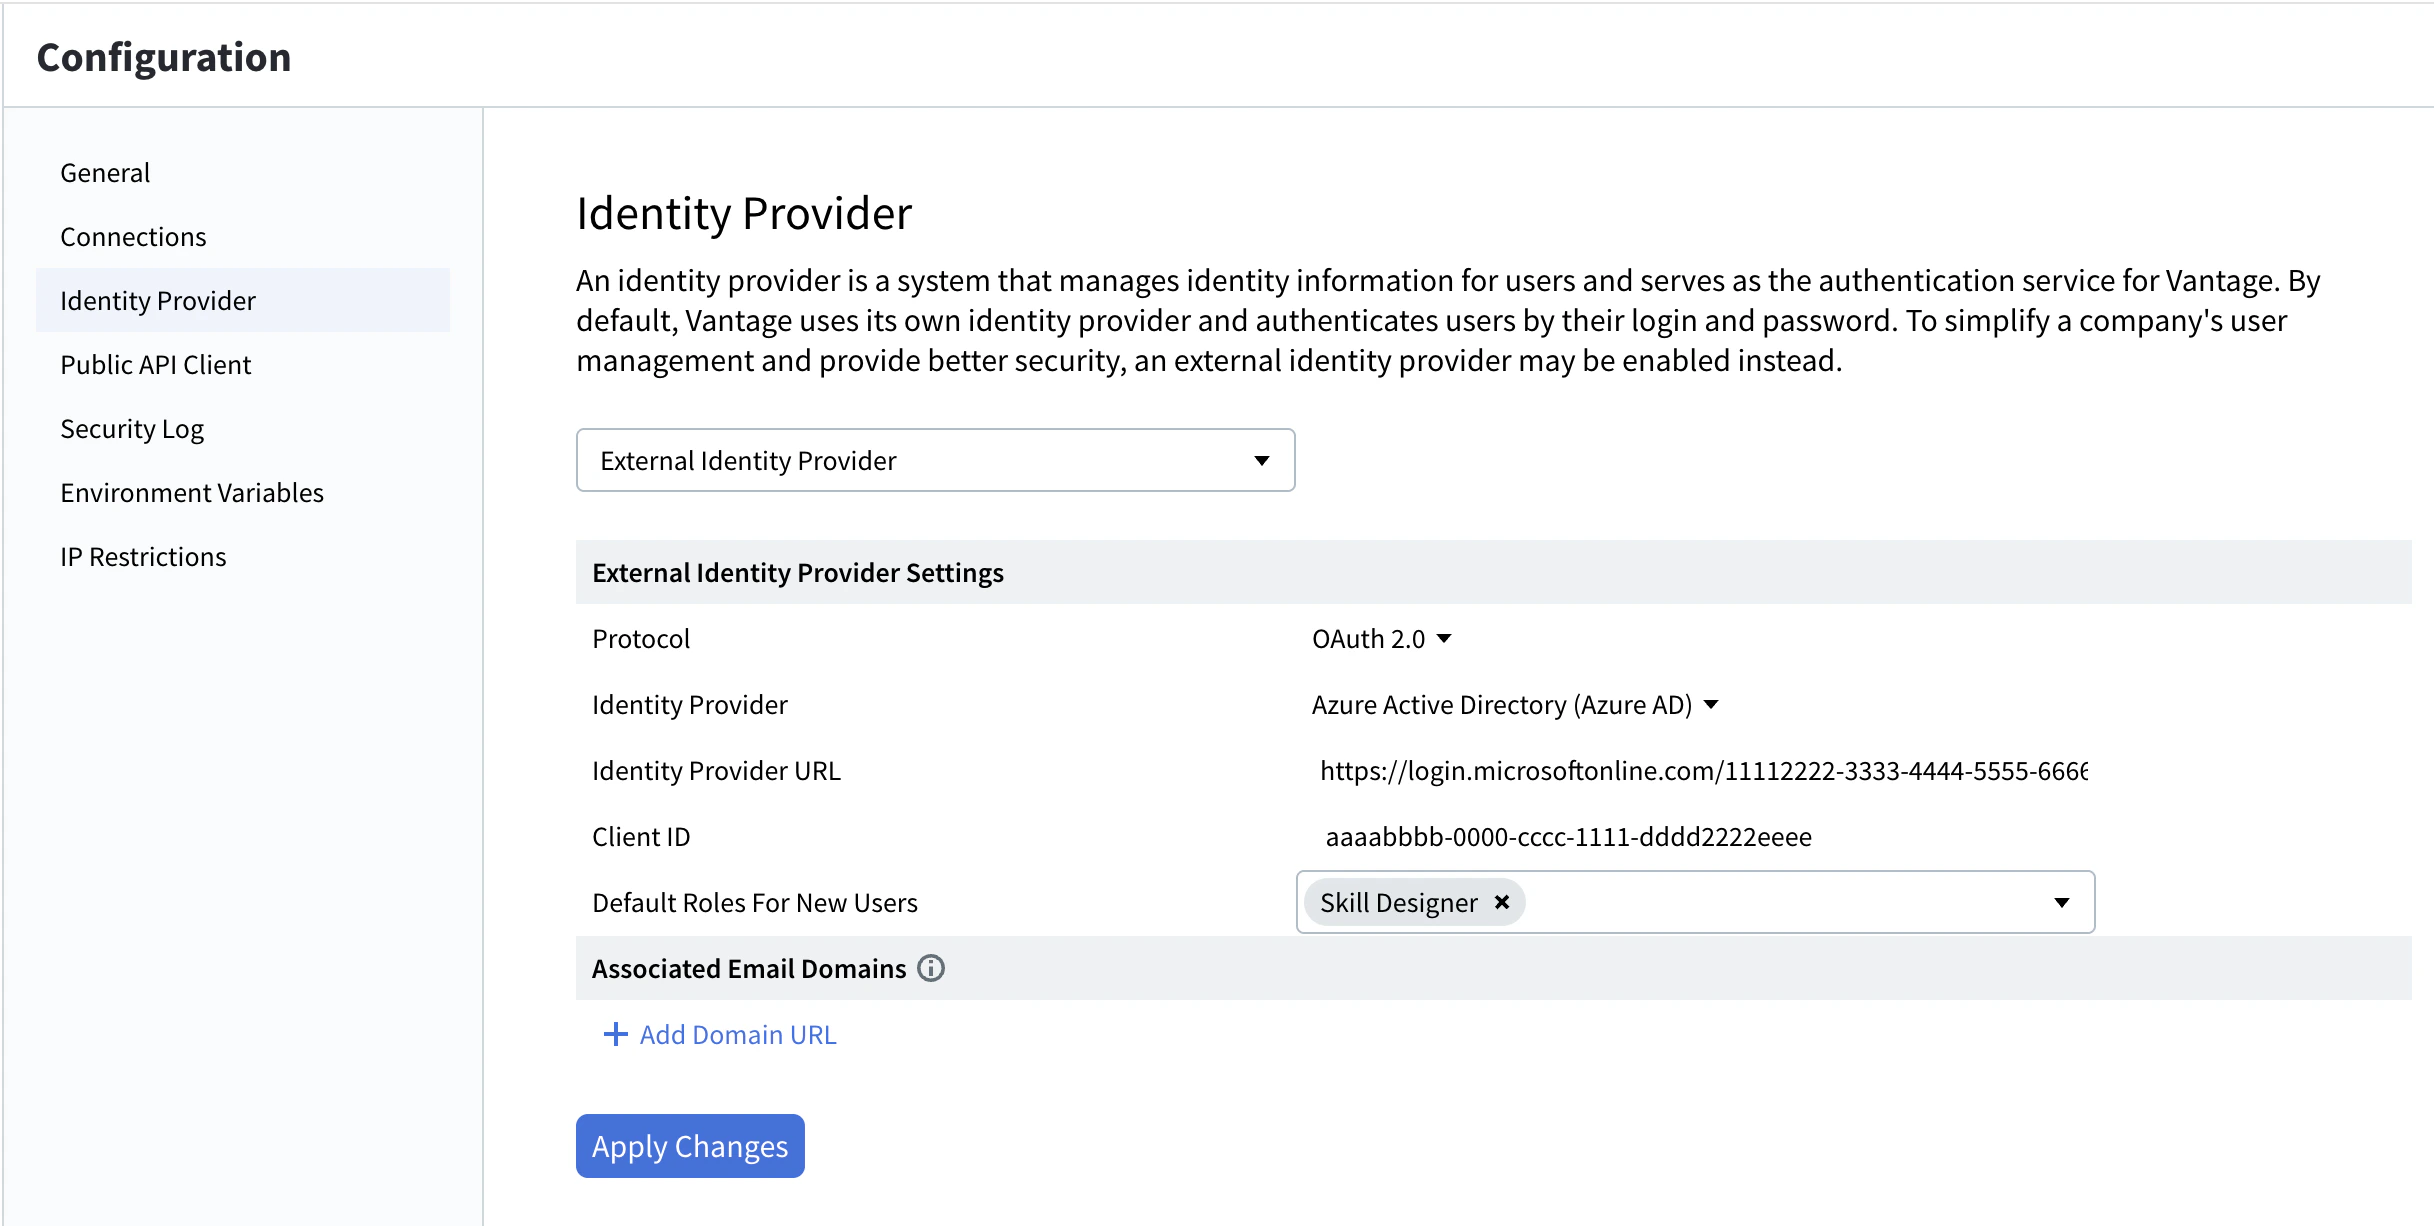
5
(Optional) Add associated email domains
Under Associated Email Domains, click + Add Domain URL, enter the domain (for example,
example.com) in the Domain URL field, and click Apply. Repeat to add more. For more information, see Associated email domains.6
Apply the configuration
Click Apply Changes.
Reverting to the Vantage Identity Provider. To undo, select Vantage in the top drop-down and click Apply Changes. You can do this as long as your current session (access token) hasn’t expired. If it has expired, you’ll need to sign in through the configured External Identity Provider to regain access — contact your System Administrator if you’re locked out.
OAuth 2.0 fields
SAML 2.0 fields
Setting up default roles for new users
When users are created automatically through an External Identity Provider, Vantage assigns them the default roles you configure here.1
Open the Identity Provider settings
In Vantage, click Configuration in the left pane, and then click Identity Provider and select External Identity Provider from the top drop-down.
2
Select default roles
In the Default Roles For New Users field, select one or more roles to automatically assign to new users.
3
Apply the configuration
Click Apply Changes.
For each selected role, the Allow all current and further skills toggle is on by default, giving new users access to every skill in the tenant. You can adjust this later for individual users from the Users page. See Role-based access control for details on each role.