Required parameters
Specify the following parameters:- The address of the Laserfiche server
- The name of the Laserfiche repository to be used
- The username and password for the Laserfiche account that uploads the documents
If you leave the credentials empty
The documents are uploaded under the Windows user account that runs the uploading process. Which account that is depends on how the upload starts:- Started by a Processing Station – The upload runs under the account running the Processing Station.
- Started by a user – The upload runs under the account that the user logged in with on the ABBYY FlexiCapture station where they started the upload.
Grant the account rights to add documents
The account must have sufficient privileges to add new documents to the repository.1
Open the Laserfiche Administration Console
Log in to the repository using an administrator account.
2
Open the repository users
In the layout pane on the left, go to the Users and Groups node and select Repository Users.
3
Open the account properties
From the user list, select the user whose account details are used to export documents, and then open the account properties.
4
Clear the read-only restriction for the user
On the General tab, make sure the Only allow read-only access (Manage Trustees privilege bypasses this setting) checkbox is cleared.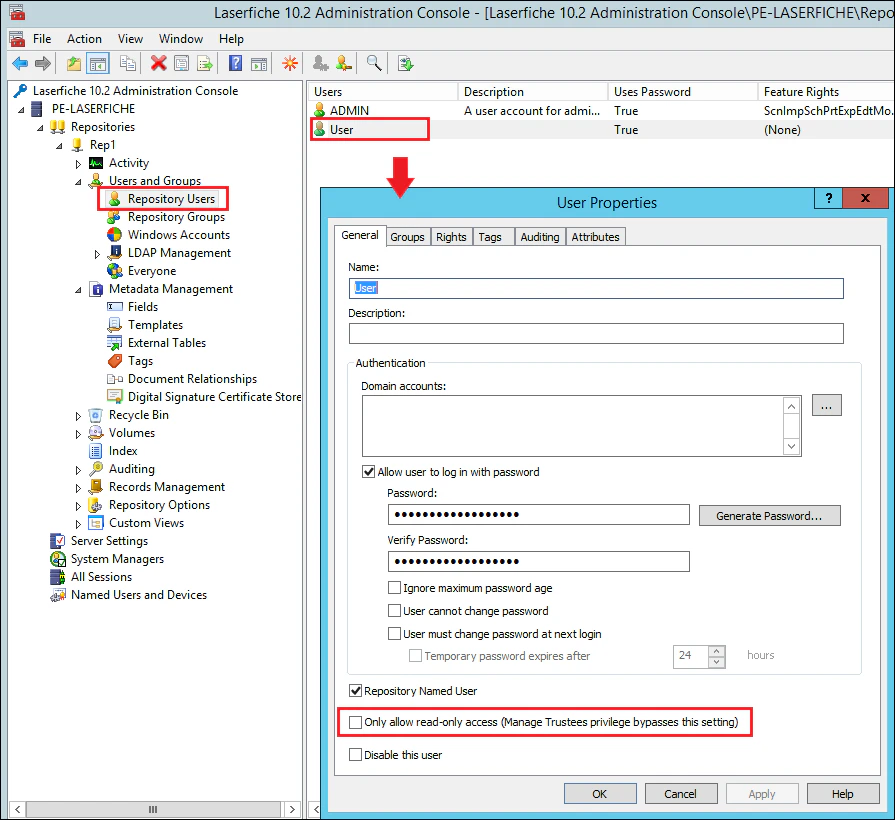
5
Clear the read-only restriction for the group
If the user belongs to a group, open the settings for that group and make sure the same Only allow read-only access checkbox is cleared on its General tab.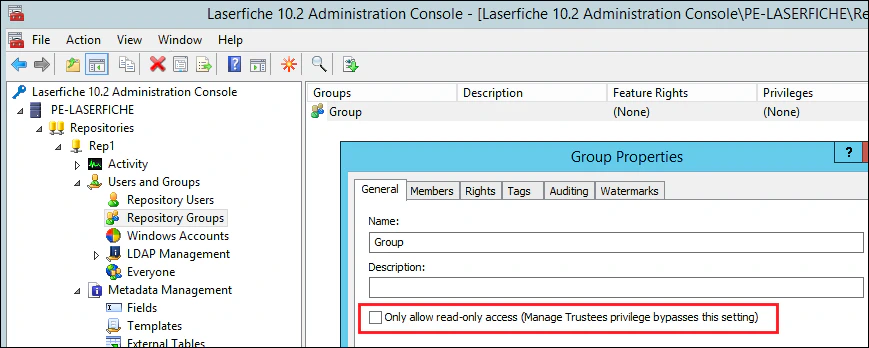
6
Open the Laserfiche client
Log in to the repository using an administrator account, and then select Access Rights from the repository context menu.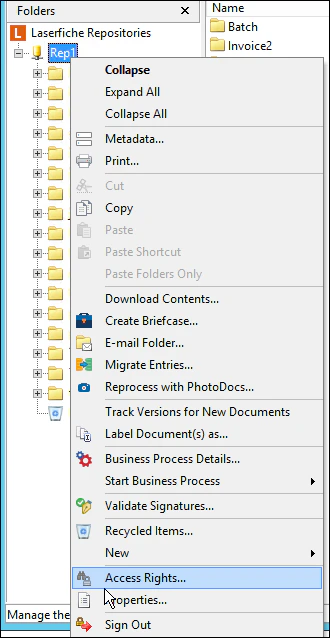
7
Select the user
On the Access Rights tab, select the appropriate user.If the user is missing from the list, click Add, select the user in the Create Access Control Entry dialog box, select This folder, subfolder and documents from the drop-down list, and then click OK.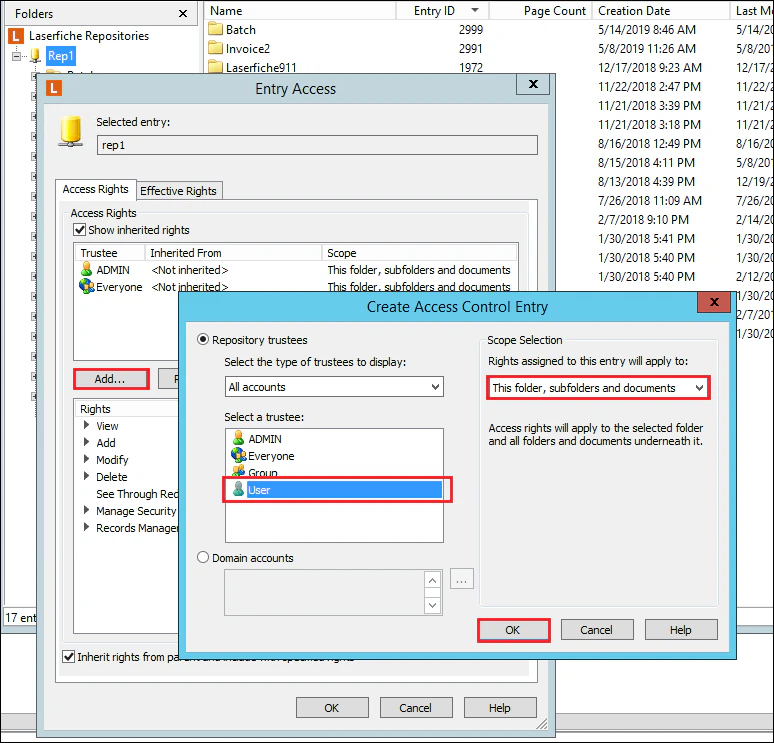
8
Enable the access rights
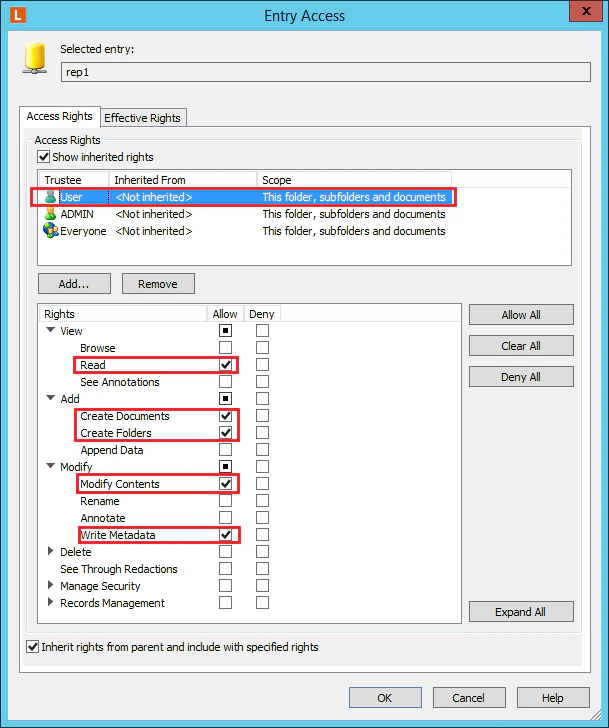
In the Entry Access window, select the added user and enable the access rights shown in the following screenshot, and then click OK.