
Create the case
1
Add a case type
Open Dev Studio and click Case Types → Add a case type.
2
Name the case
Specify a name for your case, and then click Submit.
3
Add the case fields
On the Data model tab, add the required case fields by clicking Add field.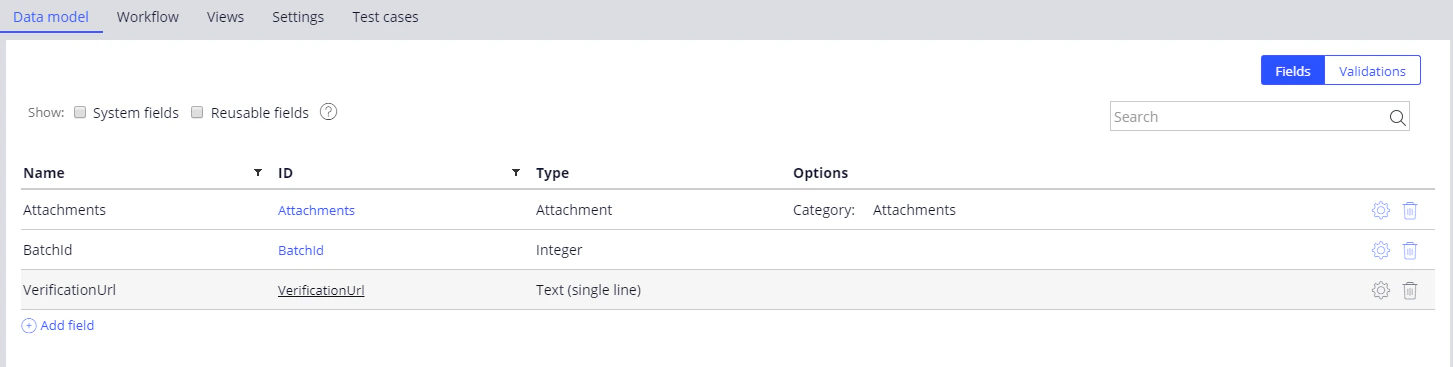
4
Add the life cycle
On the Workflow tab, click Add life cycle and create the stages with Collect information steps.You can give the stages and steps any names you like.
5
Save the case
Click Save.
Required case fields
Life cycle stages
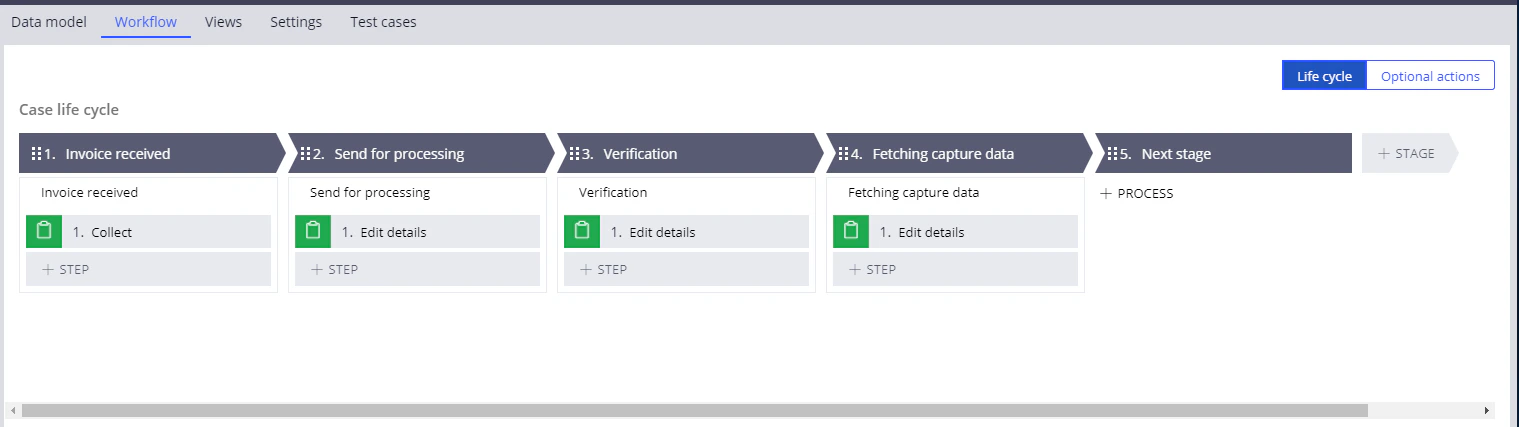
What the Send for processing stage does
At this stage, Pega performs the following actions:- Extracts an image from the case attachment
- Sends the image to ABBYY FlexiCapture for processing
- Records the ABBYY FlexiCapture batch identifier in the case fields
- Waits for the batch processing to finish
- Updates the case field holding the verification URL if the batch has stopped at the verification stage
- Proceeds to the data fetching stage if the batch has been processed completely