
Match the FlexiLayout with each image
1
Open each image
Open the sample images in the batch one at a time.
2
Match the FlexiLayout with the image
Select the Match command on the FlexiLayout menu or the shortcut menu of the image.
3
Review the match result
When the image and its FlexiLayout match successfully, FlexiLayout Studio marks the hypothesis it formulates about the FormHeader element with  in the Tree of Hypotheses.Click the hypothesis. FlexiLayout Studio draws a blue frame around the detected element, and the hypothesis properties appear in the Properties window.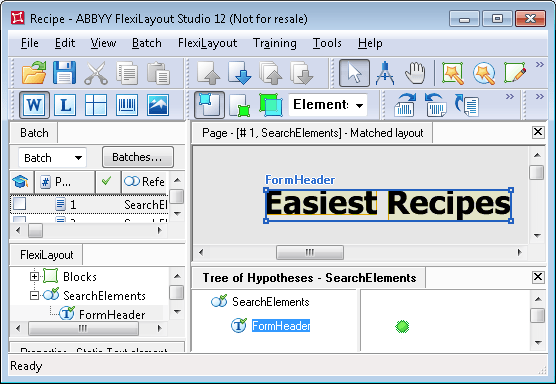
in the Tree of Hypotheses.Click the hypothesis. FlexiLayout Studio draws a blue frame around the detected element, and the hypothesis properties appear in the Properties window.Rule out the phrase above the heading
On some images, FlexiLayout Studio finds part of the phrase above the document heading instead of the heading itself. The phrase “Enjoy our collection of easiest recipes from over 50 countries of the world” appears on almost all the images in the batch. To prevent FlexiLayout Studio from mistaking this phrase for the document heading, adjust the properties of the identifier element. The phrase always appears above the document heading, so FlexiLayout Studio must look for the object that has all the element’s properties and is closest to the bottom edge of the image.1
Open the Advanced tab of the FormHeader properties
Open the Properties dialog box for the FormHeader element, and then click the Advanced tab.
2
Add the search constraint
In the Advanced pre-search relations field, specify an additional search constraint that looks for the object closest to the bottom edge of the image. In the FlexiLayout language, enter
NearestY: PageRect.Bottom;.3
Match the FlexiLayout again
Match the FlexiLayout with the images again. FlexiLayout Studio now reliably detects the document headings described by the FormHeader element on all the test images.